Photograms
what is a photogram?
a photogram is a picture made with light sensitive paper by exposing the paper to white light with various objects on the paper to block the light and make the subject and the different variations are made by exposing the light and using developer in different techniques and ways.
a photogram is a picture made with light sensitive paper by exposing the paper to white light with various objects on the paper to block the light and make the subject and the different variations are made by exposing the light and using developer in different techniques and ways.

double exposure
to do double exposure I had to first get my un exposed piece of paper and put and object on it (this object would be the background ) I then exposed it to white light for half the time I would usually do , after that I removed the object and added a new object( this would be the foreground) and exposed it for the same amount of time and once putting the paper through the developing process you get the double exposure effect. 
weaving
a weaving photogram is made by getting 2 photograms and cutting them into strips one of hem length way and the other width way. once you have cut them both weave them together and tape the back. my strips were each 1cm long. |

photogram
a regular photogram is the easiest out of the six to do for this picture all i had to do was get my unexposed piece of paper and put my object on it (the subject) and expose it to light then run it through developer stop and fix chemicals. 
painting with developer
to get this effect on a photogram you have to make a regular photogram then instead of dipping the whole image in the developer solution you paint it on with a paintbrush . |

sandwich print
the sandwich print is the what you want to do to reverse the colours on a photogram you would normally want to do this because a un edited photogram naturally comes inverted. to do this you have to get an unexposed piece of laminate paper and put it facing up then get a photogram that already has something on it and put it on top of the unexposed paper (like a sandwich) then expose it to white light and develop the paper. 
solarization
the solarization effect is achieved by exposing the same image to white light twice the timings for both exposures are the first one is (1 or 2 seconds) and second one is half the time to get this silver tint |
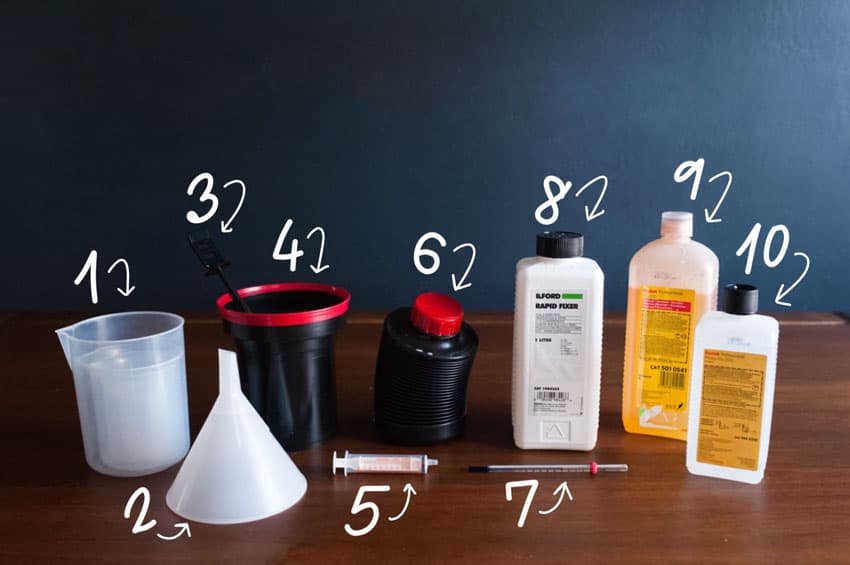
The darkroom

|
The dark room is a place were we can develop our photos or photograms that we made with light sensitive paper. the reason we need a darkroom is because it will blacken / damage the photos if it was not dark as the photos would be exposed to white light. that's is also the reason we can have red light in the room as it wont affect the light sensitive paper but can still affect the film used in film cameras.
the process of developing a picture in a darkroom is flashing white light on a piece of light sensitive paper and then put the exposed paper through developer stop and fix chemicals then rinse it through water and dry it |
The pinhole camera
the pinhole camera is the most simple camera you can use it is composed of a can and a piece of light sensitive paper. in order to use it you need to expose the pinhole for a couple of seconds then develop the paper you put inside of the camera. you have to develop it in a dark room in order to not corrupt the image and use developer start and fix chemicals then run the image through water then dry it .
the camera obscura

Ben Nathan - STÉNOPÉ
|
ben Nathan captures the functionality of the city and industry through a pin hole camera just like the one I used. He specialises in photography art and film and he aims to show the change in city and city environment through access of public and private spaces here are some examples of his work
|
|


My response
Making
|
|
The pinhole camera is a camera we made out of a drink can by getting a pin and poking a hole in the side of the camera we then covered the whole in electrical tape to use as a shutter. then cut the top and made a lid out of an opaque to block all light. we put some film sensitive paper in the can and quickly exposing it we then put it through developer fixer and stopper chemicals to show the picture taken.
|


Attempts
my task was to take a picture from a perspective of looking out a window , a photo outside and a photo of a person. to help me with this task so I would get better photos I would hold the camera as still as possible and try get the light in the background so my photo wasn't under exposed and expose it for a specific time.
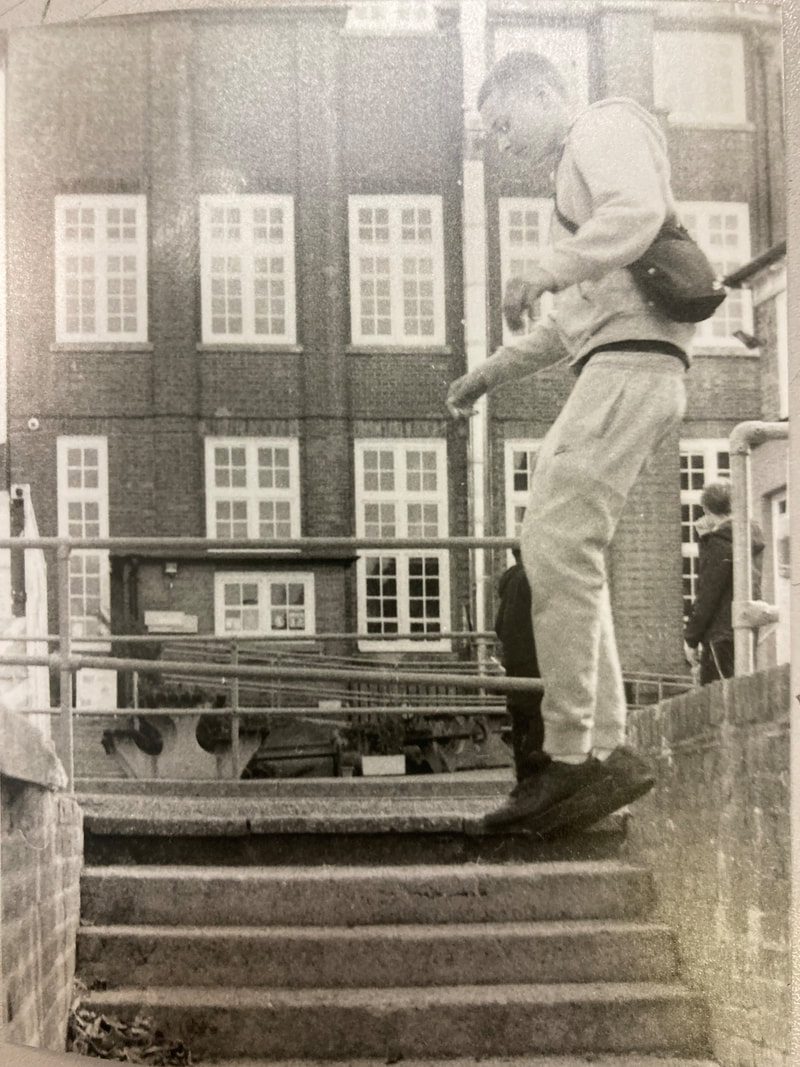
The window shot

|
I took this photo from the top of a building from a window overlooking fortismere school. the exposure on this photo was 3 seconds and to help avoid blur was propped up by a box. this was a good example of the window shot as the subject behind the window is clear ad in focus while still being able to see the window frame.
|
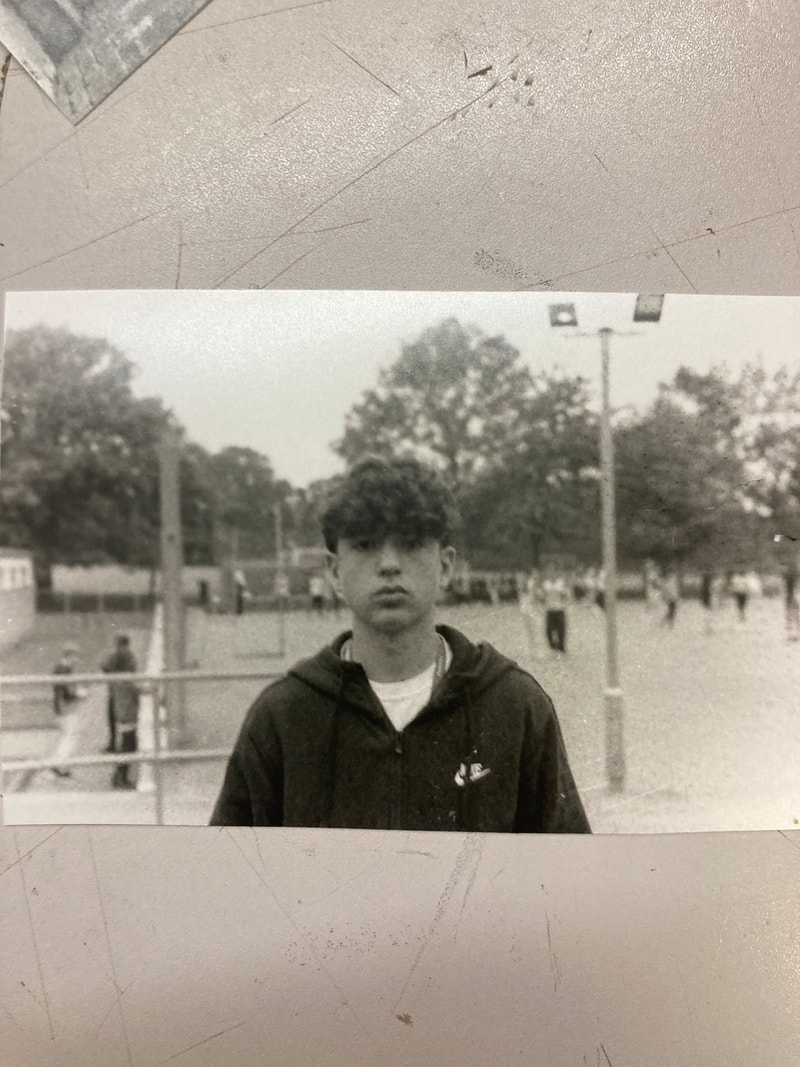
Outside

|
this photo was taken outside of the sixth form building and was propped up by a table which made it from the point of view of hip line. I did this to get the hand rail as the subject of the picture and to help get rid of blur. I exposed this picture for 2 seconds.
|
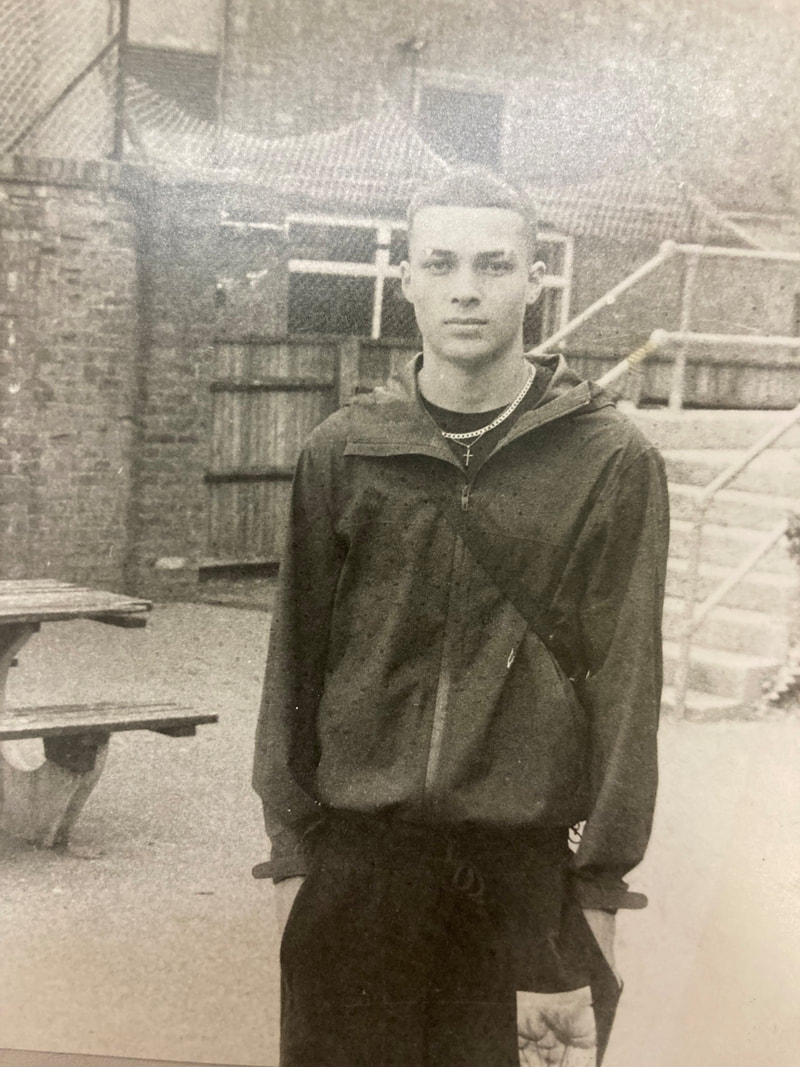
Photo of a person

|
this photo was again taken outside the fortismere sixth form building and shows a person standing outside his building I exposed this photo for 3 seconds and I didn't prop it up on anything
|
The Film Camera

after our project with the pinhole camera we moved onto the manual slr film camera .which is basically just a perfected pinhole camera as it works by inserting a roll of film in the back of the camera winding it to the other side and then you hit the shutter button to take the picture. you can focus the image by adjusting the lens and zoom in and out with the same thing you can also adjust shutter speed.
My process
for the film camera we practiced taking photos of people with a iso of 400 and we experimented with the shutter speed.
in order to show faster shutter speeds we took shots of people jumping and by doing this we capture them mid air giving the effect that they are floating.
in order to show faster shutter speeds we took shots of people jumping and by doing this we capture them mid air giving the effect that they are floating.

developing the film
|
to develop the film we first had to take the film out the camera by winding it out back into the roll you can do this while the film is still in the camera so it does not get exposed by light. once you get the film out you place it in a tub and pour the developing chemicals inside the tub we also had to dilute the chemicals with water in a 1 to 9 ration and we left the chemicals in the tub at 5 minutes at a time .
|
|
my individual prints
after the film developed we placed them out in the dark room on a light sensitive piece of paper and exposed light through them then developed the paper to get a look of all the photos we took here are mine.

tester prints
we then did tester prints were we chose one or 2 images and exposed them under the white light for different lengths of times to see what was the perfect exposure to get the best enlarged image of a certain piece of film. and these were my test strip.


my final work
these were my best photos out of all the pictures I took with the film camera
|
|
|
what is a portrait
according to oxford languages dictionary a portrait is "a painting, drawing, photograph, or engraving of a person, especially one depicting only the face or head and shoulders."
'Portraiture is a very old art form going back at least to ancient Egypt, where it flourished from about 5,000 years ago. Before the invention of photography a painted, sculpted, or drawn portrait was the only way to record the appearance of someone. But portraits have always been more than just a record. They have been used to show the power, importance, virtue, beauty, wealth, taste, learning or other qualities of the sitter.'Tate
'Portraiture is a very old art form going back at least to ancient Egypt, where it flourished from about 5,000 years ago. Before the invention of photography a painted, sculpted, or drawn portrait was the only way to record the appearance of someone. But portraits have always been more than just a record. They have been used to show the power, importance, virtue, beauty, wealth, taste, learning or other qualities of the sitter.'Tate
The selfie
the selfie is a self portrait photograph normally taken by a digital camera or a smart phone.
but although selfies are normally taken with modern technology and is seen as a modern part of photography . the first ever selfie was taken by Robert Cornelius in 1839. Robert Cornelius was an American photographer who took the photo 2 years after the invention of the daguerreotype but only months after he shared the invention with the public. this photo is also considered to not only be the first ever selfie but the first ever picture of a person.
but although selfies are normally taken with modern technology and is seen as a modern part of photography . the first ever selfie was taken by Robert Cornelius in 1839. Robert Cornelius was an American photographer who took the photo 2 years after the invention of the daguerreotype but only months after he shared the invention with the public. this photo is also considered to not only be the first ever selfie but the first ever picture of a person.
This is the fist ever selfie
Robert Cornelius (1839)
Robert Cornelius (1839)

Task
Selfie experiment 1: The reflective selfie
Selfie experiment 2: The obscured selfie
Selfie experiment3: The shadow selfie
Lighting
for this task we had to photograph a student of our choice in different kinds of lighting this task was to helps us further understand how different lightings change the photo and how to use lighting to our advantage.
Character recognition: Myra Greene
|
in this next task we looked at a photographer called myra greene she created portrait images of herself with her project called "character recognition" she takes the style of photographer that was used in the 19thcentury through colonialism and slavery for this project she took pictures of different parts of her face for example a shot of just her lips or just her nose or a very close up side profile . she would never take a photo of the whole face and only parts she does this because she views these features as the features of race. she looked into how people look and judge based on race and black people and she took the style of a mugshot kind of photography. her work is to the right.
|
|
My response
Best edits
Light and shadow : Valerie Kabis
|
Valerie kabis is a photographer who is interested in shapes and how limiting light helps create and show these shapes . she often plays and experiments with contrast , light and shutter speed in her photos resulting in an almost abstract photo that uses blur to its advantage. her subjects are often always peoples faces and all of her photos are in black and white
|
|
Shadow and light portrait variation
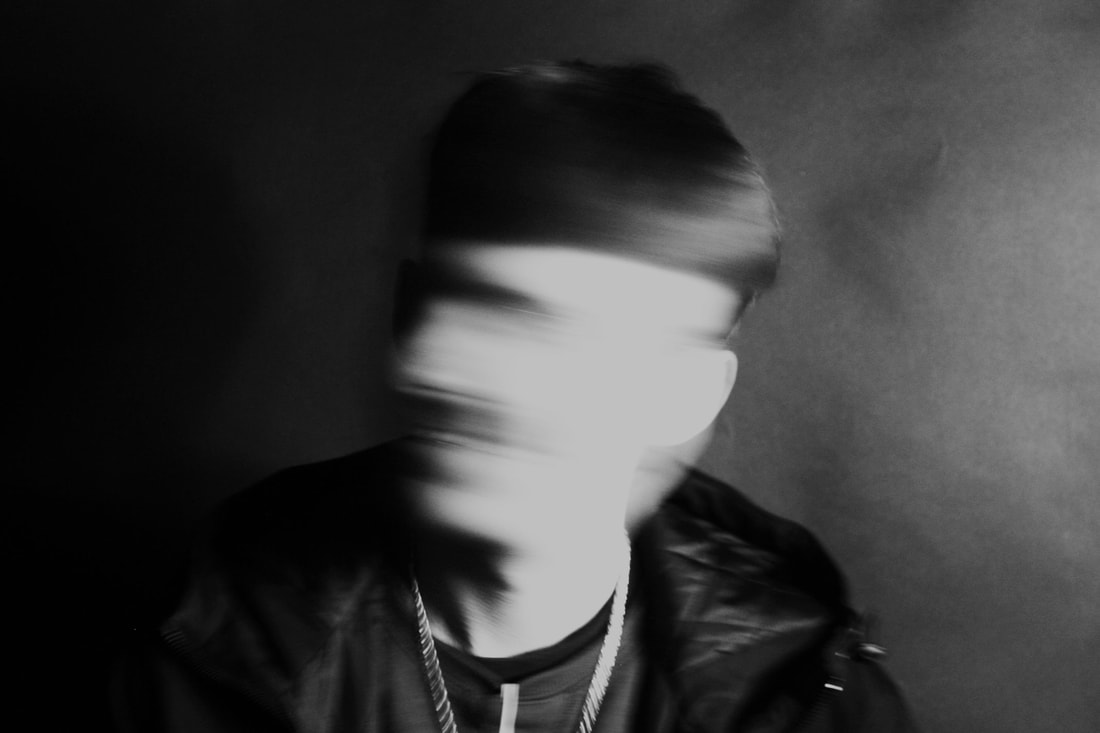
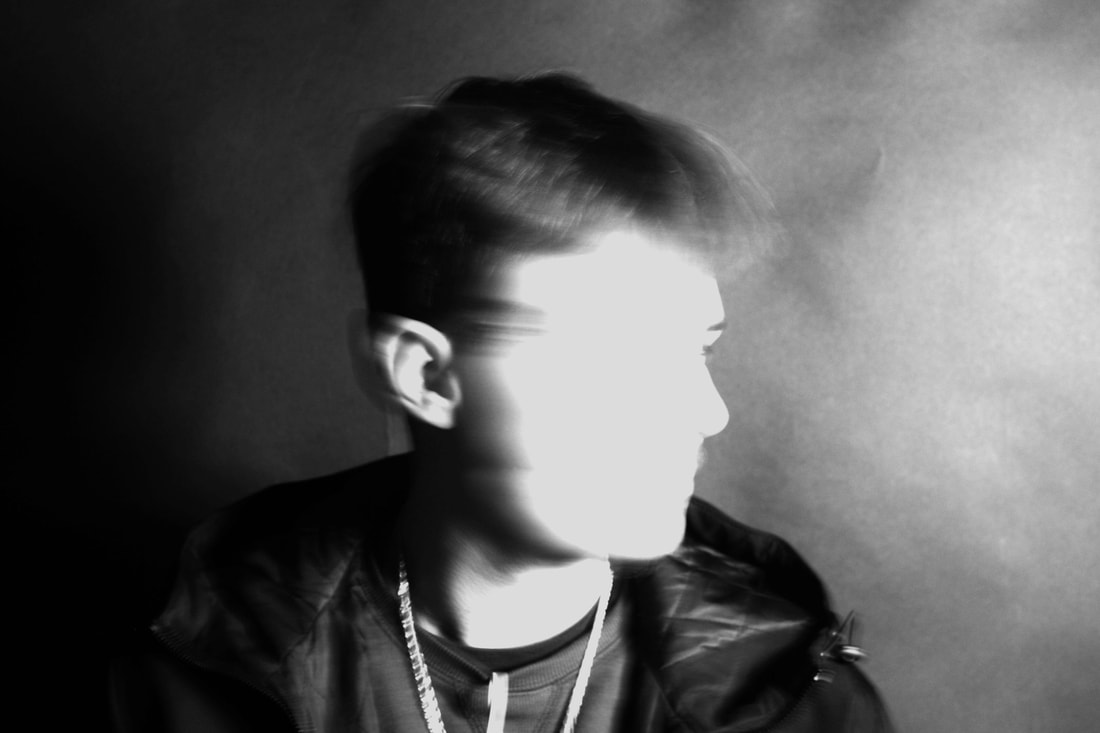
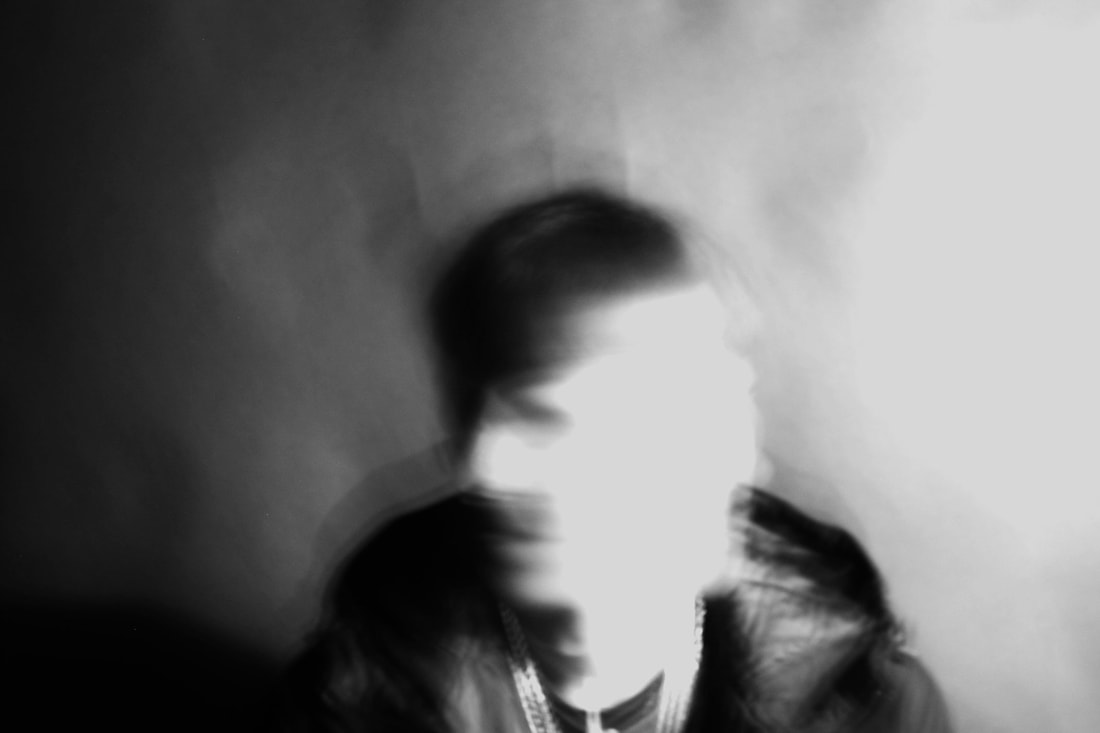
in this task I had to take photos of a person and experiment with light levels and shutter speed. we had to use a low shutter speed and get them to shake there head to give an abnormal blurred effect. this was my response to Valerie kalbi's
Best edits
|
|
|
Documentary portrait
George town - Lewis Khan
the next photographer we looked at was lewis khan who created a documentary called george town. this documentry was a out a man called george from south london and was made because lewis khann had a connection with him as he would grow up seeing him every day so over the course of 6 years lewis khan would take photos of george and document his so viewers could watch the documentry and see the photos and see how someone else lives and see another persons life in there perspective.
|
Georgetown from lewis khan on Vimeo. |
|
Task 1
For this task we had to go around school and take photos of people and there environment. we did this to reflect Lewis khans work of George town were he went around his local area and took photos of interesting people and there environment that is why we went around our school as it mirrors our local area


Best edits
|
DT
This slideshow was of the dt department and of one of the teachers mr ligget the following pictures are of his office and work space.
|
PE
This slide show was of the PE department and the per teacher the objects in his room repre4sent PE as there are various sports equipment and human anatomy.
|
English
Slide show was of the English department and the objects represent the English literature as you can see various books and folders.
|
Task 2
This task was very similar to task 1 but instead of going around school we had to do something more personal like a family or friend for this task I photographed joe and his environment which was around his house and his room which represent his interests such as sports this was to again to represent Lewis khans work which was George town.


The big up portrait
|
Ben Watts, a London-born photographer, commenced his artistic journey in 1990 after relocating from Sydney College of Arts to New York. In 2004, he introduced 'Big Up,' a project akin to a "collage scrapbook" capturing an impressive array of portraits featuring rappers, actors, boxers, dancers, skateboarders, children, and various street personas. This endeavor was born out of his deep fascination with the faces and vibrancy of New York's urban youth culture, culminating in a book.
|
|
for this task we had to imatate and respond to Ben watts work . in my version we did it about a boxer called mohammed ali and i made my compilation of some of his most famous moments in his carreer including snapshots of his fights and famous quotes that he was recorded saying
here is my work below.
here is my work below.

Independent development
for my independent development we had to choose one of the photographers we had researched recently and take there work further for this i chose valerie kabis.
I chose valerie kabis because I liked he was she used shutter speed to take an abstract photo of a person I also was intrigued by her play with light to further advance her photo.
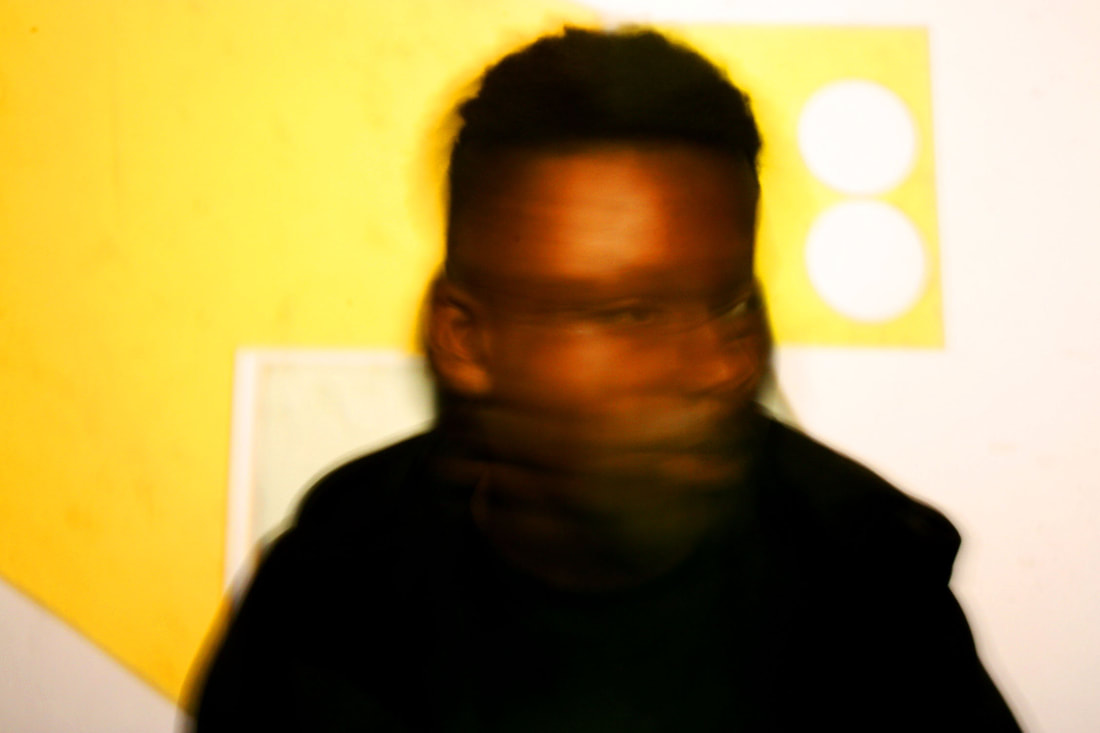
I also liked how I could have more colourful photos and liked how it added to the background. for this task I wanted to create colourful abstract photos with different angles and use blur to my advantage by increasing the shutter speed I also wanted to keep the photos modern and simple
I chose valerie kabis because I liked he was she used shutter speed to take an abstract photo of a person I also was intrigued by her play with light to further advance her photo.
I also liked how I could have more colourful photos and liked how it added to the background. for this task I wanted to create colourful abstract photos with different angles and use blur to my advantage by increasing the shutter speed I also wanted to keep the photos modern and simple
First development
In my first development I experimented with colour and detail by trying more bright colours like pink and doing some pictures with a simplistic background and some with a more detailed one. I also tried different shutter speeds with some of the pictures being still and some with a blurred face the pictures with a blurred face had a 2 second exposure and the still faced pictures had a 1/100th of a second exposure.
the subject of these photos is my classmate sitting down in front of a white canvas with colours projected on his face and background. I also took photos from different angles to see what was the best and sometimes used 2 different backgrounds combined to further develop the background and make the subject pop. my pictures are below.
the subject of these photos is my classmate sitting down in front of a white canvas with colours projected on his face and background. I also took photos from different angles to see what was the best and sometimes used 2 different backgrounds combined to further develop the background and make the subject pop. my pictures are below.
Best edits

|

|

|
Second development
for my second development I decided to advance the pictures of were they had simple colours projected on the subject I did this because I like how simplistic and modern it was. I still took photos at different shutter speeds again being 2 seconds for the pictures with the blurred heads and 1/100th of a second for the ones with still head. I did this as I liked to have the range of photos. I also took them from different angles. but I kept the background of the white canvas the same as it is the best if you want to project colours on them. my pictures are below.
Best edits


|

|
