Abstract form
abstract photography is a very interesting and unusual form of photography. it usually consists of images created using photography materials and equipment that doesn't have an immediate association with the physical world. Abstract photographers will often use tools such as perspective light and movement to transform the world and the image to something unrecognisable which makes it unique and different to regular photography
Abstraction mind map
The white paper test- Task 1
the first task we had under abstract for was the paper task. For this task we had to take 24 unique abstract photos with one piece of paper , the rules were that we were not allowed to cut or tear the paper but we were allowed to roll , fold , and crumple it. We took these photos in a studio with 2 pieces of large white card as our booth we were also allowed to use our phone flashlights to give different lighting affect and use coloured pieces of plastic that was given to us in order to add colour to our flashlights. the room we took these photos in also had the lights off to make sure all the lighting was from us. my 24 pictures are below.


unedited

|

|

|

|
Best edits


|


|
in this task I like how I used different angles to try and get the best shot possible and also different coloured lighting by shining my flash through different coloured plastics to get an abnormal glow affect on all my images. But if I was trying to improve my work next time I would try to get a better camera for higher quality images.
Task 2 - abstract development
for this project of abstract development we were tasked to take more abstract photos but this time inspired by photographers , we had 4 photographers to choose from who are Brendan Austin , Jaroslav Rossler , Tamara Lorenz and Francis Bruguiere. but we had to only choose 2 so I chose Tamara Lorenz and Brendan Austin, I chose these 2 because I liked Tamaras use of colour and shapes and I like Brendan's use of different kinds of paper and light.
Tamara Lorenz
|
Tamara Lorenz is a photographer who creates abstract photography. She experiments with shapes colour in order to add abstract kinds of line , shapes , tones and texture. rather than your usual photographer that will take photos of subjects Tamara will create her own reality. her photos are quite simplistic and modern . the viewer is unable to recognise a conventional subject and get occupied with the business of looking.
|
|
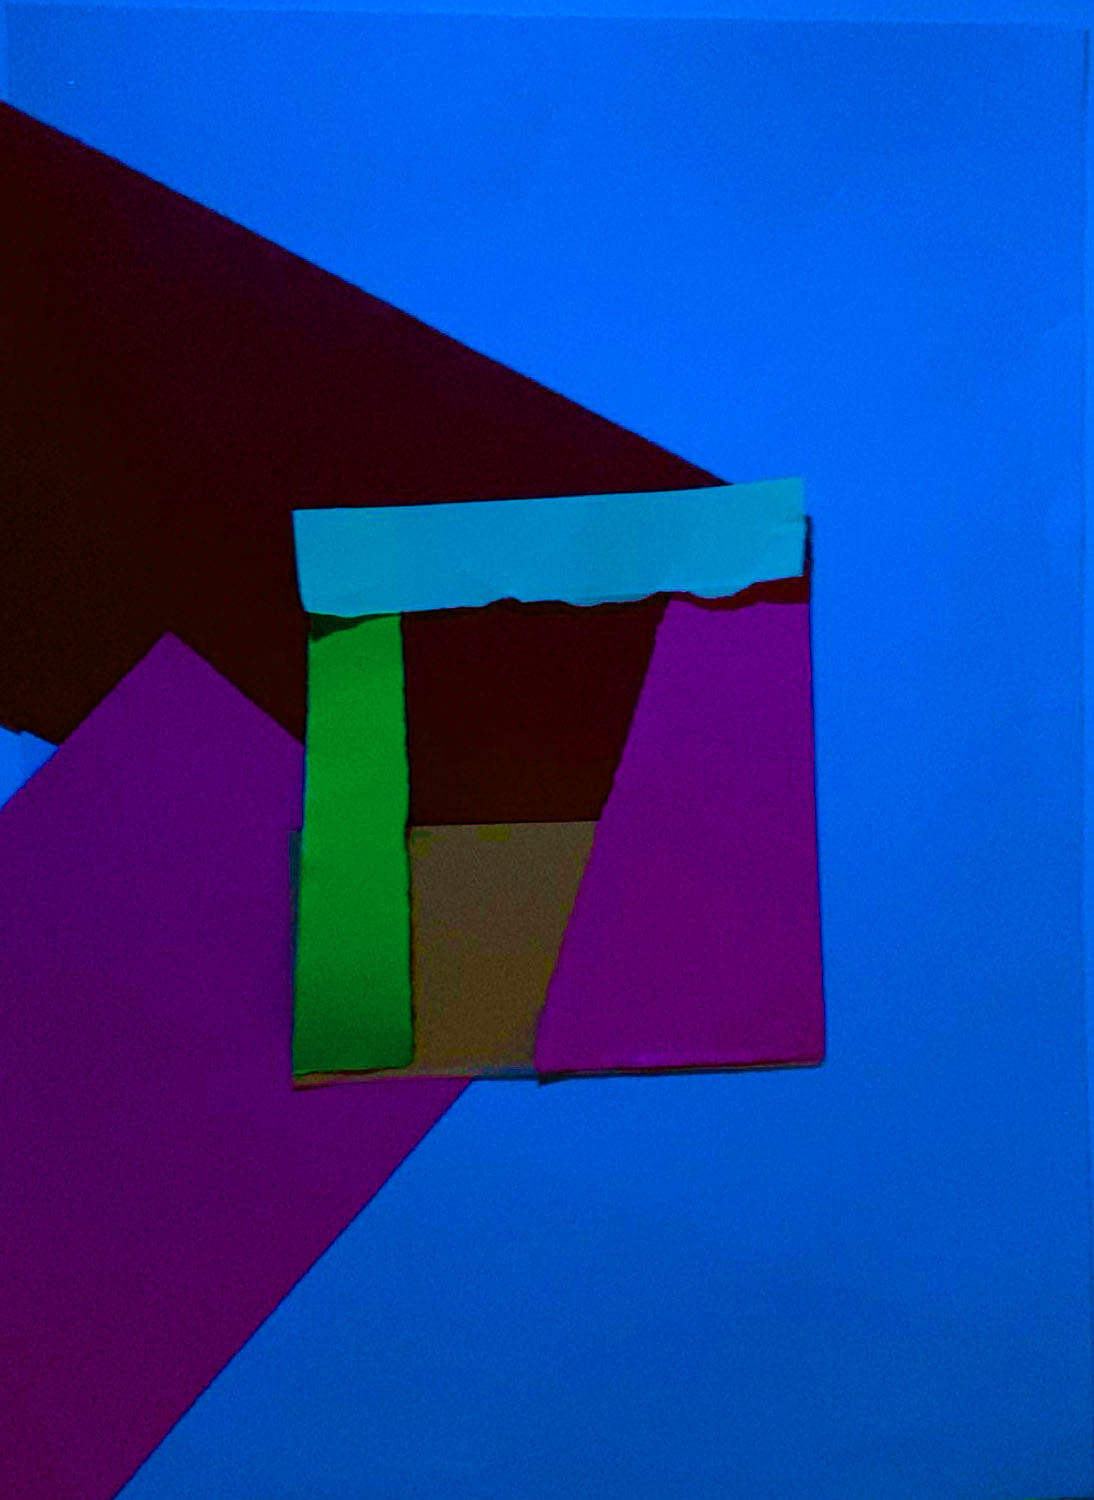
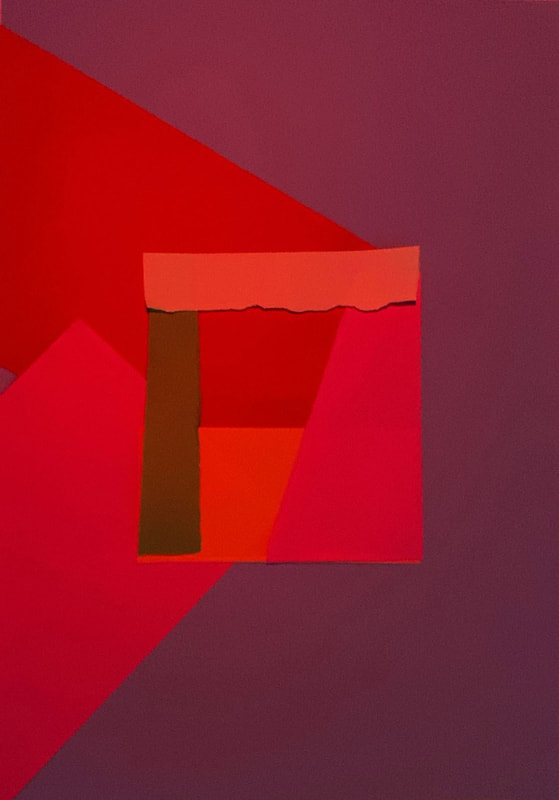
My attempt
Here are my attempts for Tamara's work for my attempts I experimented with different colour lights and paper I also experimented with the lights from different angles so the subject could have different glow effect. I did this all to give my photos an abstract look and to have the viewer questioning and intrigued on the photo and the subject.
Best edits
|
|
To edit these photos were also very simple all I did was increase vibrancy and saturation to make the colours pop more. if I was to improve this work I would get a better camera to get a higher quality picture and experiment with different shapes but I thought the colours and simplicity went well.
Brendan Austin
|
Brendan Austin creates imaginary landscapes out of paper and calls them his paper mountains. Brendan examines landscapes and nature in order to recreate them out of paper. he also examines human impact on nature and recreates them out of paper in order to have the viewer questioning the loss of meaning and reality. he uses light and a quick shutter speeds to get the effect of landscape and nature.
|
|
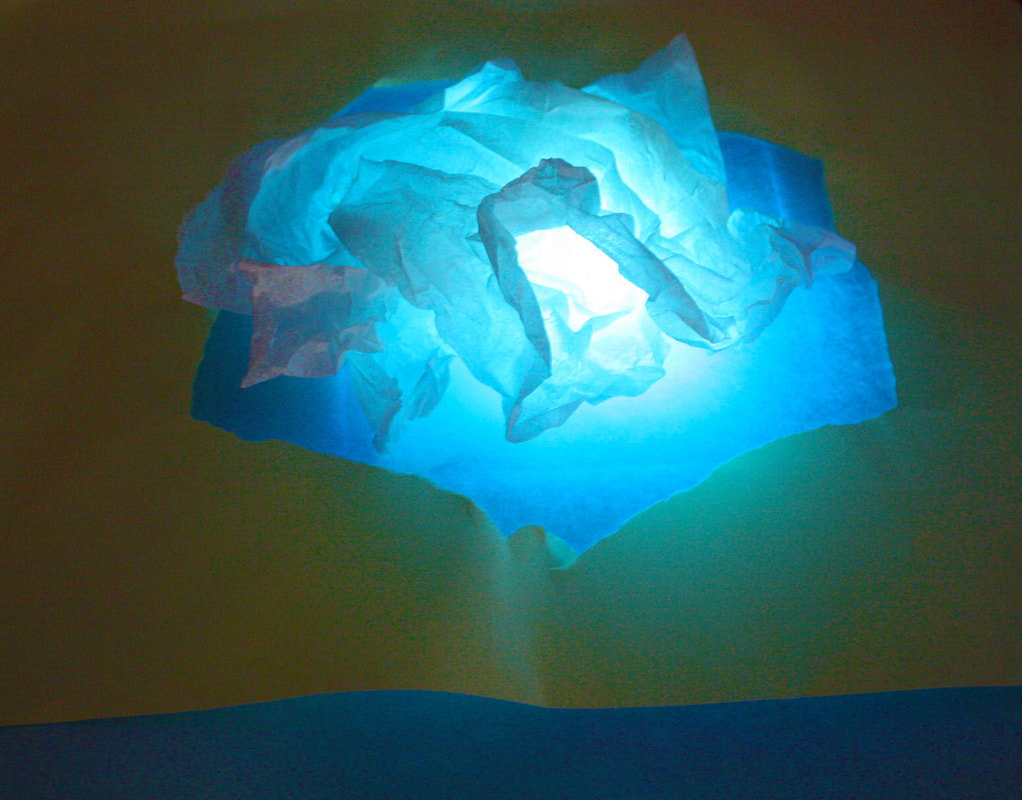
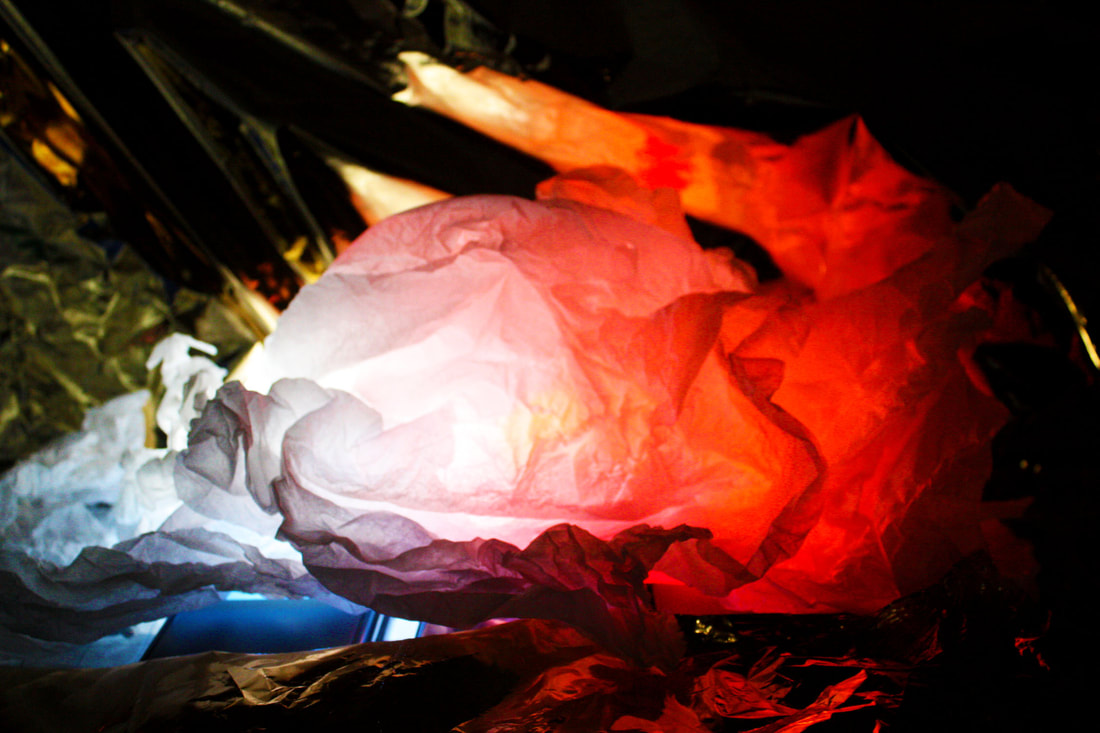
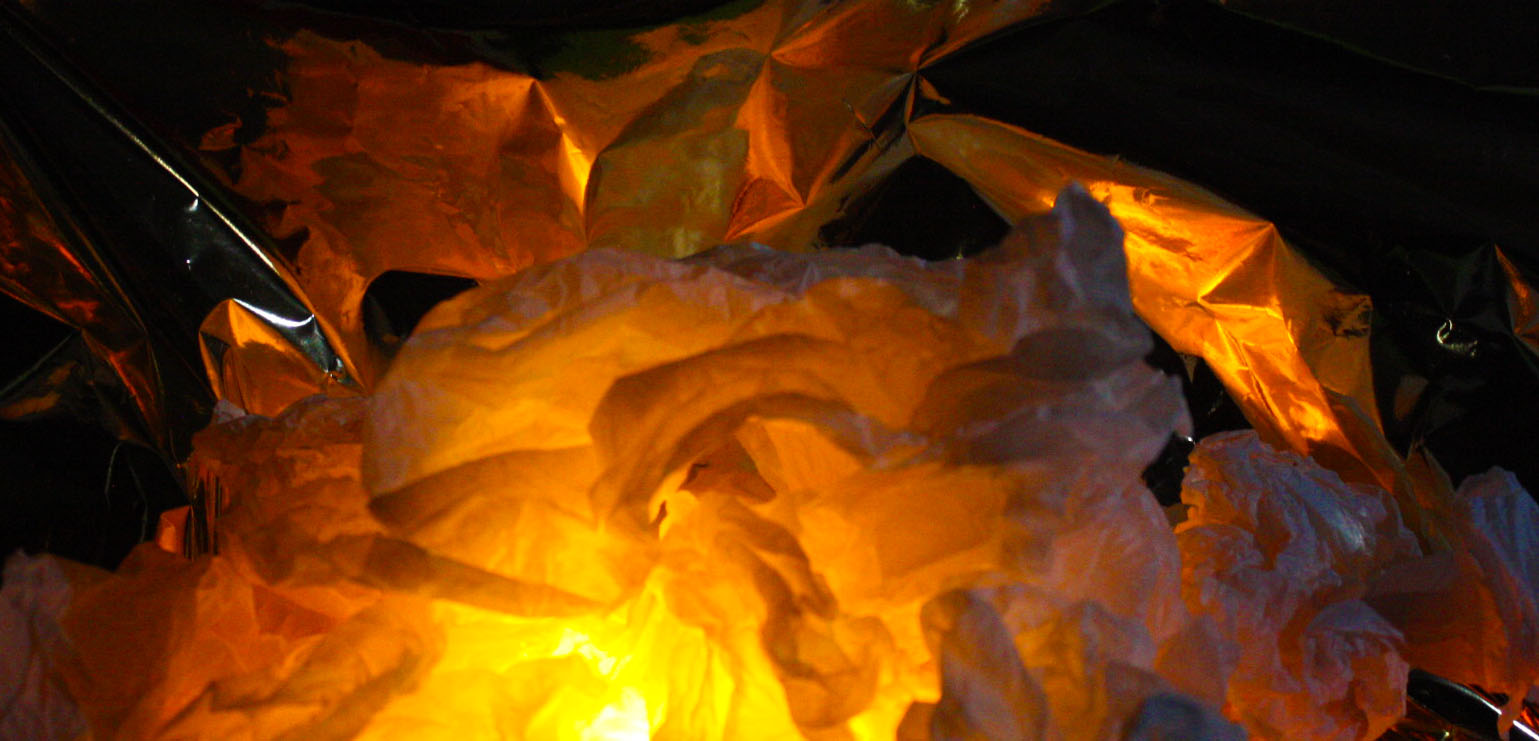
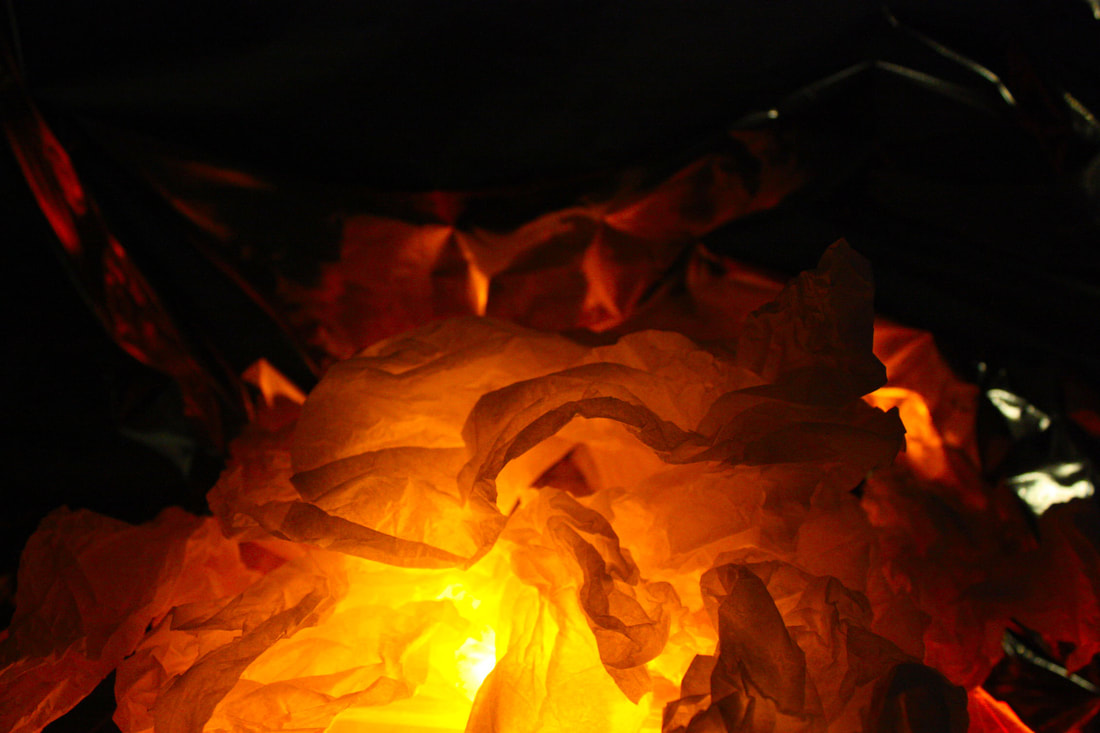
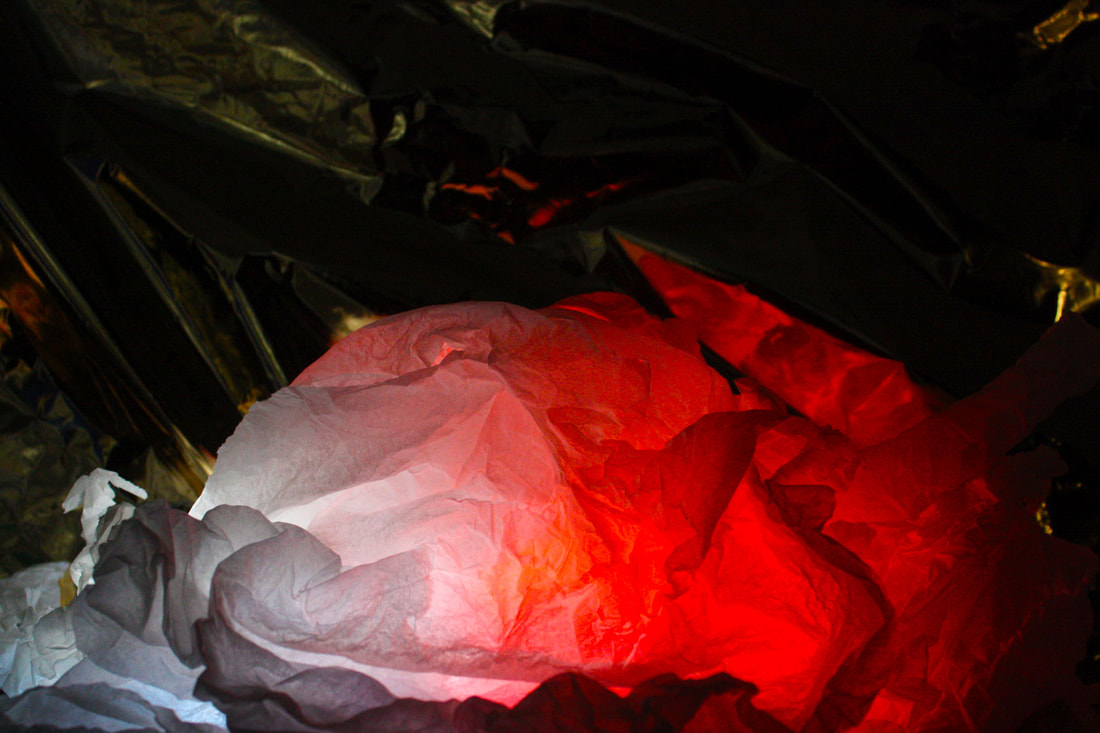
My attempt
here are my attempts for Brendan Austin's work. for this project I focused on lighting/exposure in order to achieve a more landscape effect for my photos I used a gold background and a coloured light under the scrunched paper I tried using different coloured light such us white gold and red which made the paper look almost like a storm cloud. my pictures are below.
Best edits
|
|
to edit these pictures was a simple process. what I did was just increase saturation and vibrance to make the subject look and have warmer colours as I felt it fit the project more. as you can see I took my own spin to Brendan's work and did a more abstract kind of landscapes with brighter colours but still taking influence form his angles and exposure.
Abstract photograms


Ordinary to extraordinary
Edward Weston
|
Edward Weston was born in 1886 and died in 1958 he was an American photographer who would take abstract photos of various things such as everyday objects to people to nude photography. his most popular work and the work we will be mainly focusing on for this project is his photos that he would take of everyday objects like fruit and would bring out the beauty of them by taking close up focused and shadowed pictures of them which would create a beautiful abstract photography. the camera he would use was a graflex 8 by 10 inch which was the smallest one he would use this as he liked how it was portable and how he could see the subject matter before taking the photo. he also liked to focus on light , texture , shape and form.
|
|
'Nautilus', 1927

|
This is a photograph taken by Edward Weston that consists of a nautilus shell isolated in front of a black background, this photo like many of Edward Weston's work is a close up that focuses on the subjects light , shadow , curves and contrasts all of this composes an unrecognisable image and creates an abstract unfamiliar image from a simple common object. Edward Weston wrote in 1930 "To see the Thing Itself is essential: the quintessence revealed direct without the fog of impressionism... This then: to photograph a rock, have it look like a rock. Significant presentation- not interpretation."
|
Artificial light
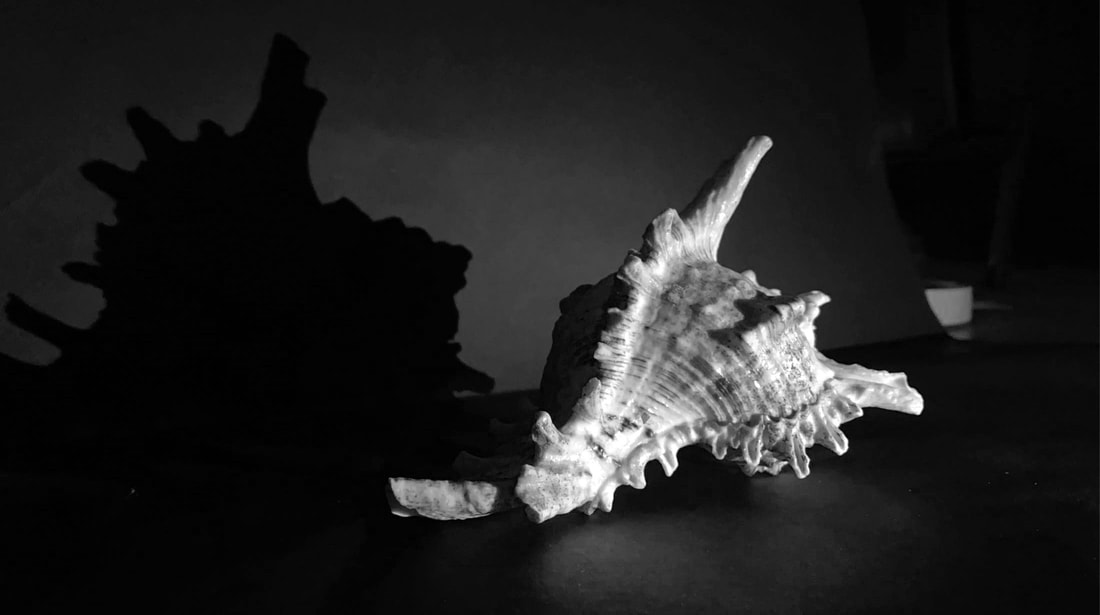
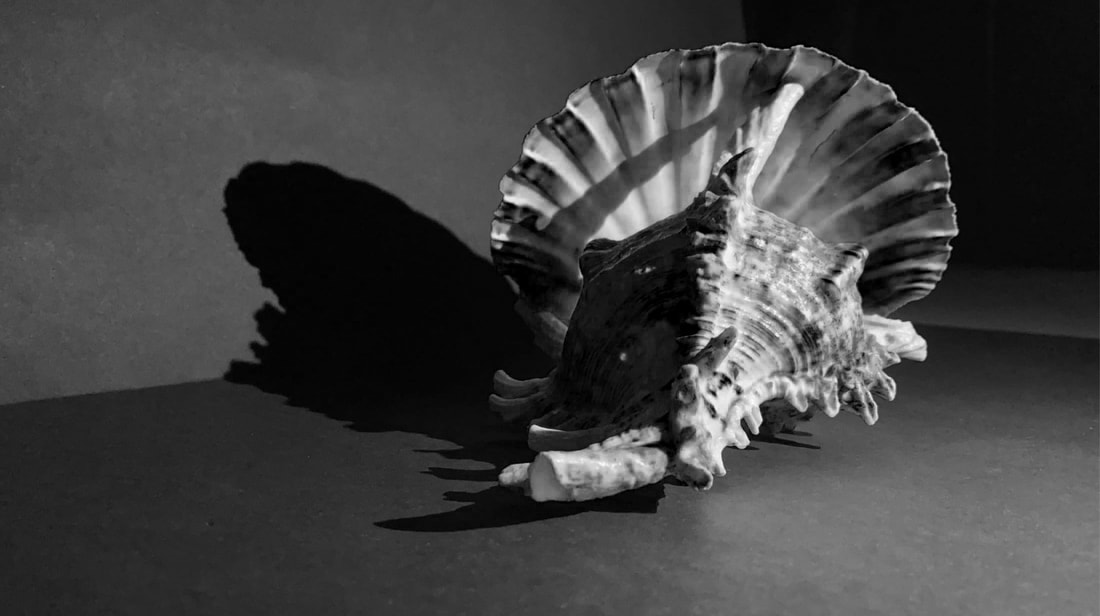
for this task we had to recreate Edward Weston's work. we could choose our subjects from fruit , vegetables or shells and I personally chose shells as i thought the lighting would look best with it. the lighting we had to use for this task was artificial light which meant the room had no lights or windows open and we only use the light from our phones/flashlights we also had our subjects be placed in front of a black backdrop we also used DSLR cameras for this project. my attempts are below.
My attempt


Best edits
|
|
The process to edit these pictures were simple all I had to do was make the photo black and white then I adjusted the light levels. in these set of photos the lighting I used , angles and focus for these pictures went well but if I were to improve I would've taken pictures of more vegetables to expand the amount of subjects I used and had more variety of photos.
Natural light
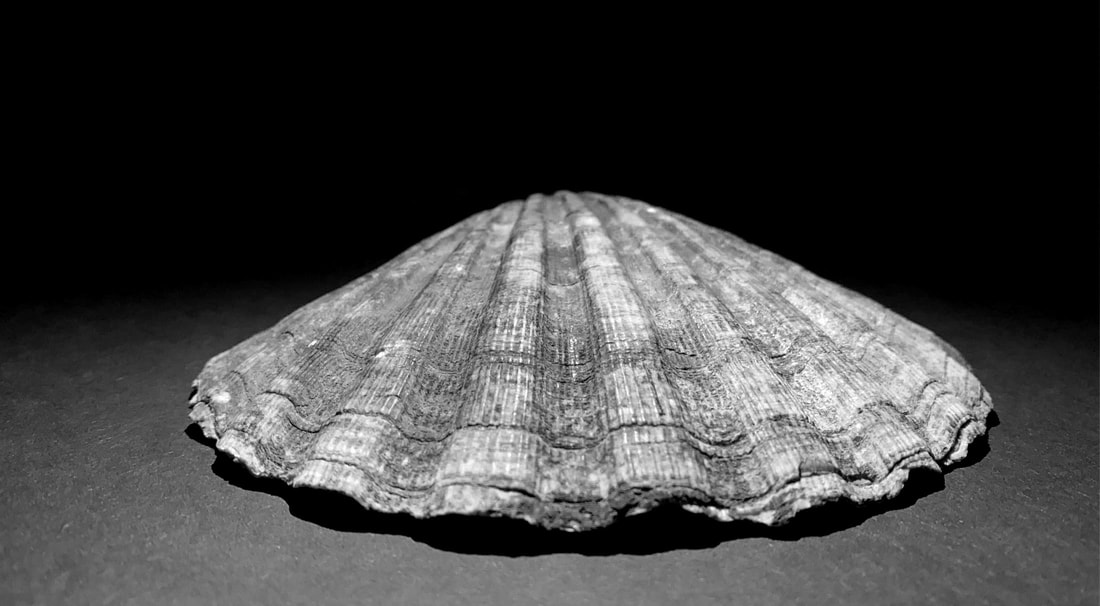
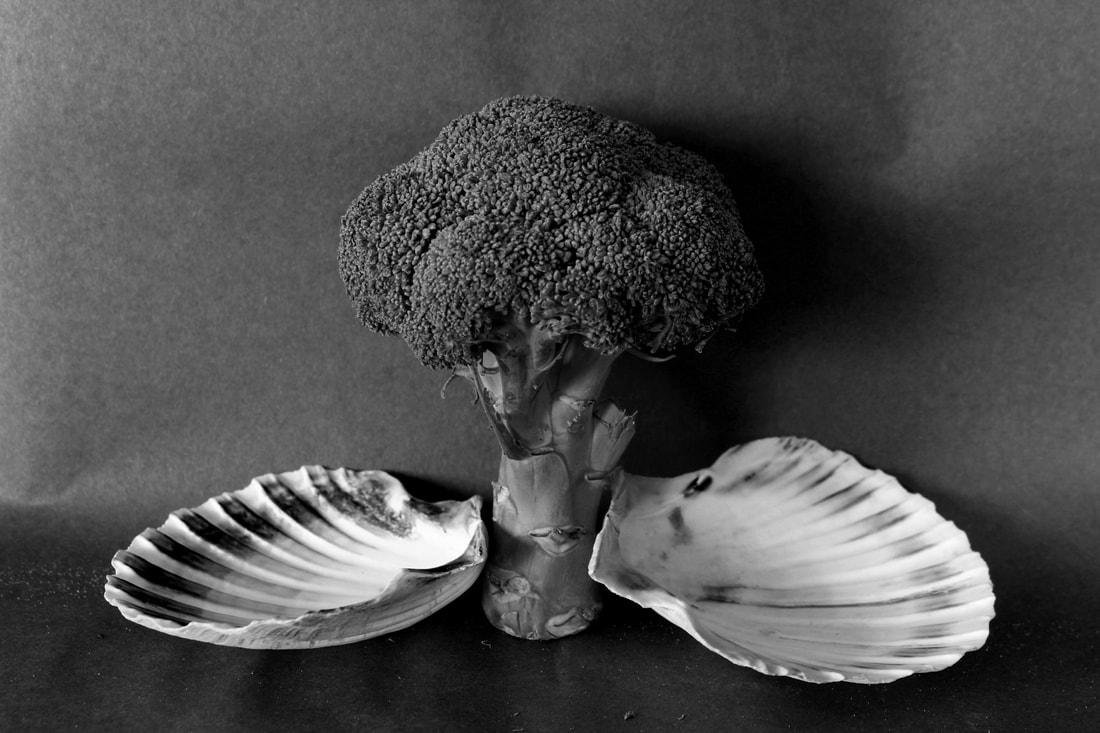
This task was very similar to the artificial light task and had the same rules the only difference was that we had to use natural light instead of artificial light to do this we opened the windows and let the daylight expose our images for this task we also used a DSLR camera and i used a low shutter speed so the images wouldn't be over exposed.
My attempts
Best edits


|

|
the editing process for this project was the same as artificial light were all I did was make the image black and white then adjusted the light levels to make the image a bit darker. I think the light and subject positioning of his photo went well but if I were to improve I would've taken more super close up photos.
Abstract comparisons: Body and nature
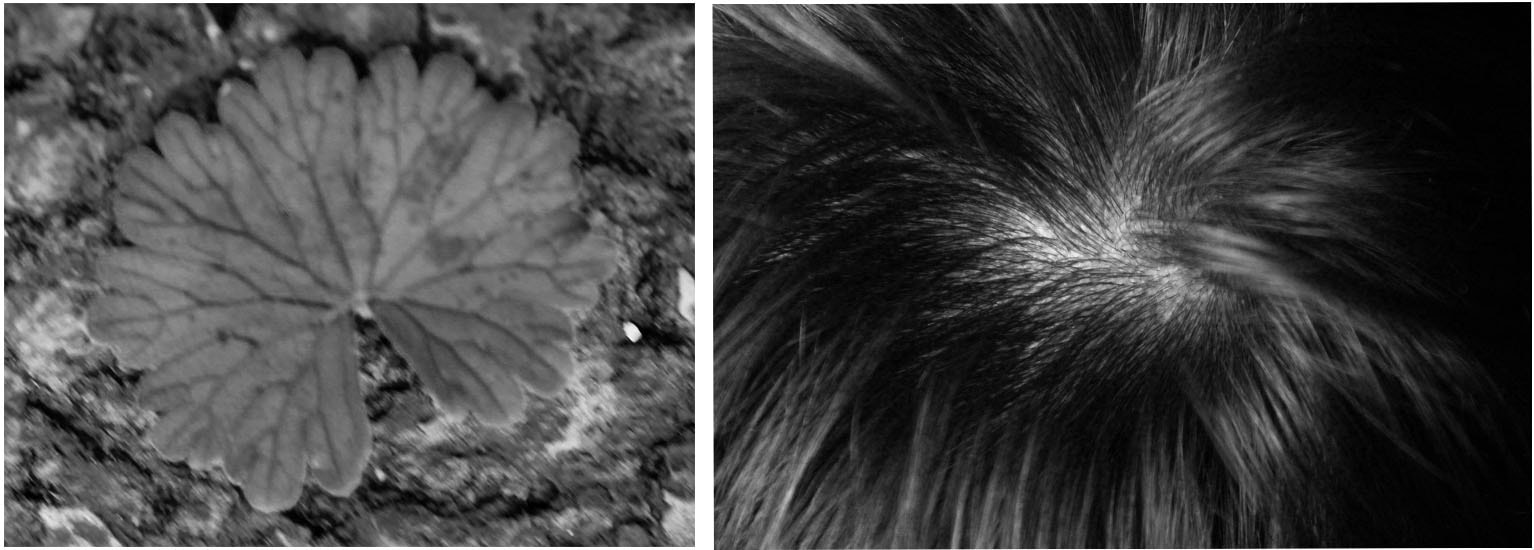
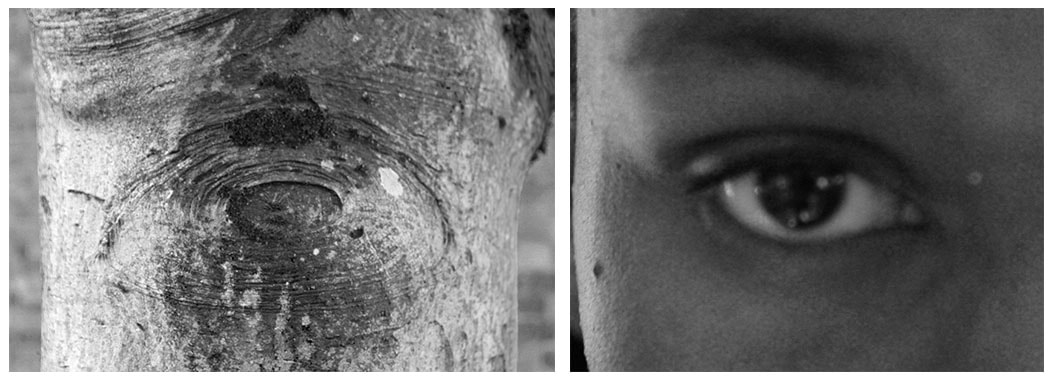
for this task I had to look at the photographer Alicja Brodowicz her work is abstracts and takes pictures of nature and compares them to the human body. they bridge the gap between nature and humans by finding the similarities in them through photography.
Alicja Brodowicz
|
here are Alicja Brodowicz series of diptychs. she likes to take pictures of the human body and compare them to nature specifically close ups and isolates different body parts.
she captures the lines curves and creases of the human body in order to compare them to nature. the majority of her photos are in black and white She states in her website that she photographs the human body naming it the 'microcosm' and then states, "The human form; irregular, wrinkled, saggy. Imperfect." her work is also abstract and she combines 2 images into one. |
A Series of Diptychs |
My attempts
for this tasks we took pictures outside of the nature and inside of peoples body parts in order to compare them. to take the pictures outside and inside we used a DSLR camera. I went out there looking for nature that resembled the human body for example a leaf that resembled lips we then experimented with exposure and focus to get the most detailed picture we could in order to further compare the nature with our subjects.
My gallery of nature:

My gallery of the body:

Best edits

The process to edit these images were simple were all I had to do was convert to black and white then I changed the light levels to get a more detailed photo. if I were to improve these photos I would try to get the focus more clear and take a wider range of photos but I think the comparisons and chosen subjects went well.
Abstract Portraits
Task 1: Bill Jacobson
|
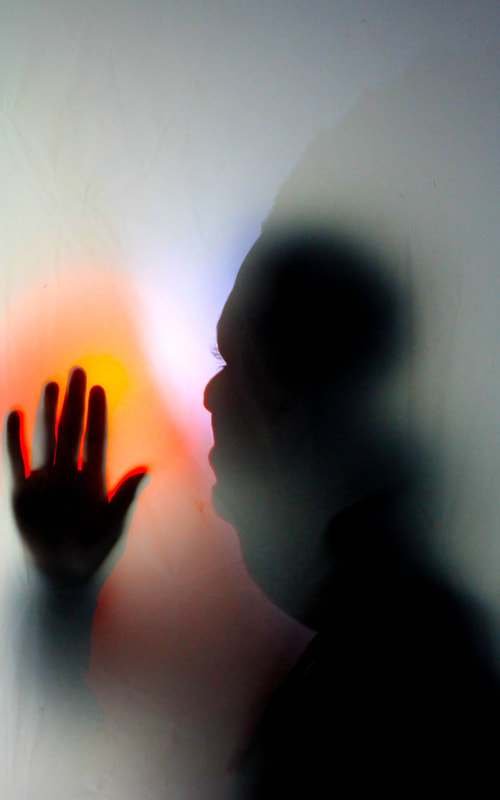
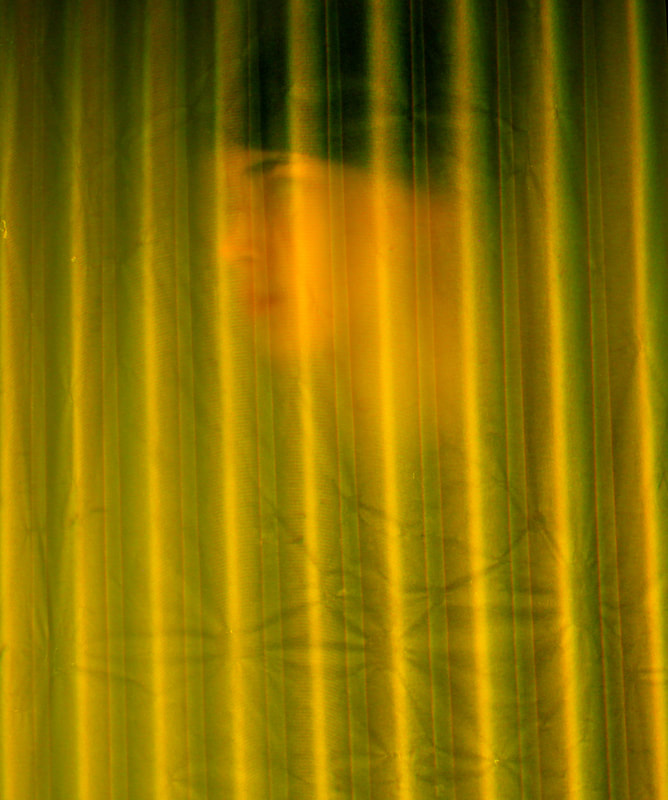
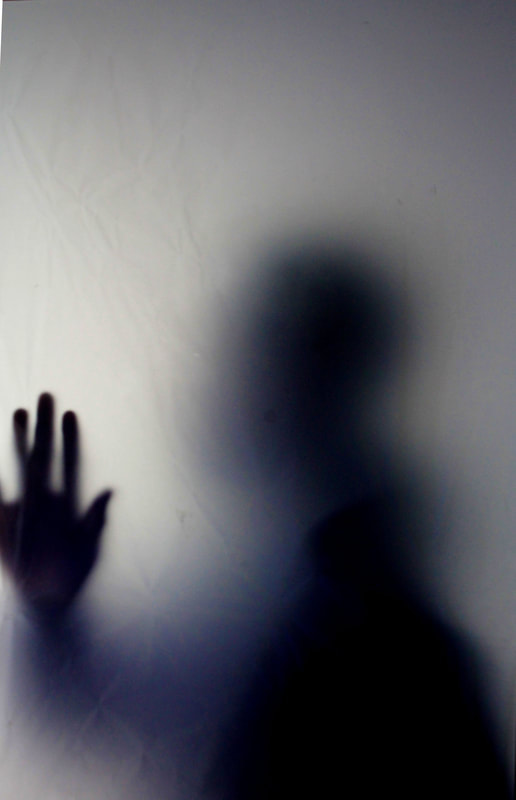
Bill Jacobson takes a form of photographer were is subject is slightly out of focus and very pale.
his subjects are usually people or land scape and captures a ghostly photo that is quite abstract and gives the viewer a sense of an un familiar and unusual feel. This is the work that Bill Jacobson is most known for and was taken at the time of the Aids epidemic and is in reflection of the people that were lost during those time which describes the haunting feeling of his work , the blurred effect of his work also captures true human likeness in both portraiture and memory. |
Jacobson's Work |
My attempts

|
for this task we used a DSLR camera we placed our subject behind a sheet of tracing paper and shined various colours of lights through it we also used a light projector to get large amounts of colour to the subject this was all to give an abstract look to the photo in response to Bill Jacobson.
The photo to the right is the setup we used. |


Best edits
|

|
the process I went through to edit these photos was I first cropped the image to get the preferred subject and background in the image I then increased hue and saturation to make the colours and person pop more and last I changed the light levels to get a better exposed image. to improve these photos I would use a wider range of colour and patterns but I think the focus and foreground went well.
Task 2: Erwin Blumenfeld
|
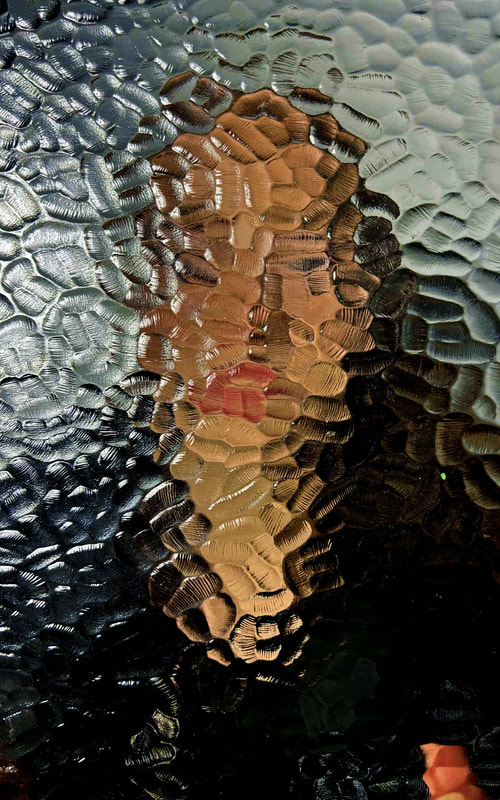
Erwin Blumenfeld is super famous for his photography in the 20th century. It was about being creative and experimenting with different techniques in his photographs.
He took all types of photographs, such as portraits, nudes and even fashion photographs. He was born in Berlin in 1897 and was greatly influenced by the Dadaists, which made his work totally unique. He did some really interesting things in the darkroom, like solarization, multiple exposures, and photomontage. |
Erwin Blumenfeld's Work |
My attempts
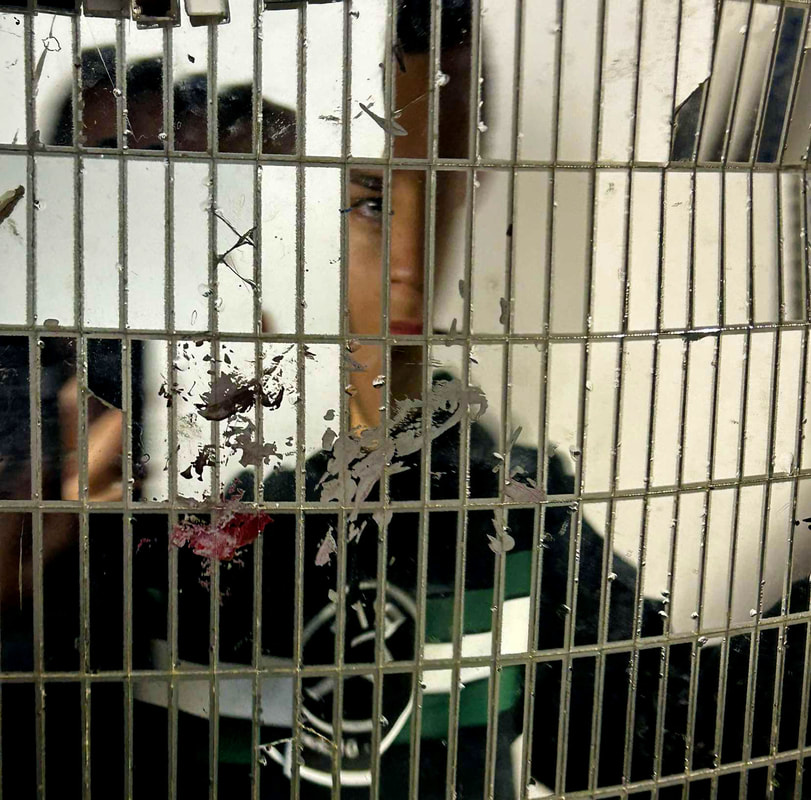
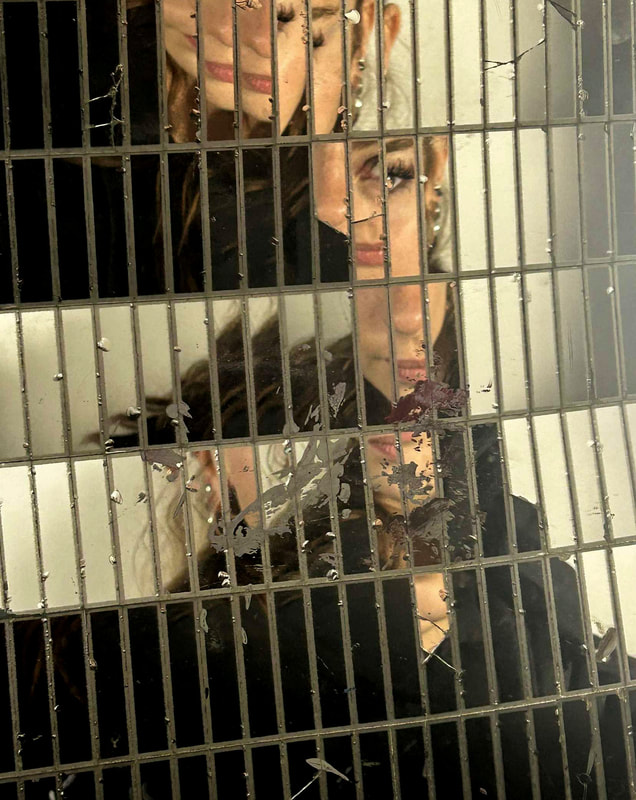
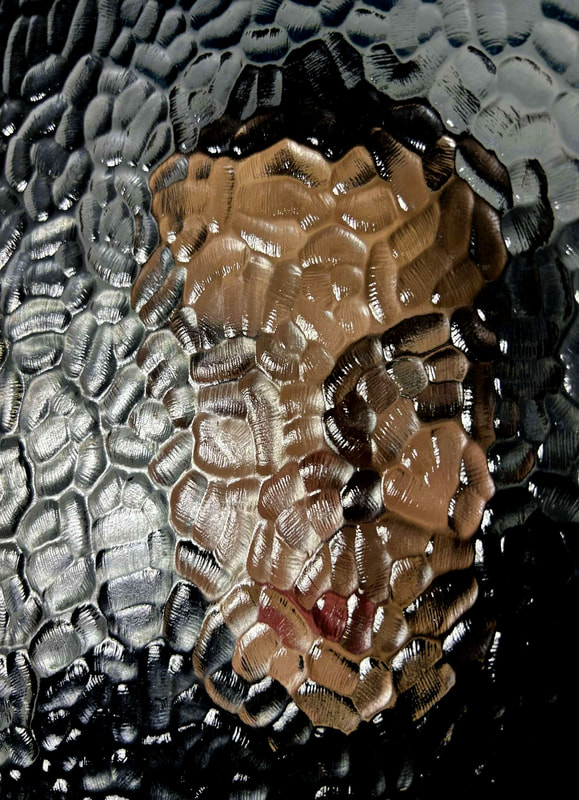
these set of images imitating Erwin's work we used a phone camera and placed our subjects between an arrange of items for this project we used different kinds of patterned glass , a type of netting and gridded mirrors. we used all of this in order to distort and change the face.

Best edits
|
|
to edit these photos I darkened the light levels to get the perfect exposure and increased the vibrancy to make the colours pop. to improve these images i would've used a wider range of props but I think the subject positioning went well.
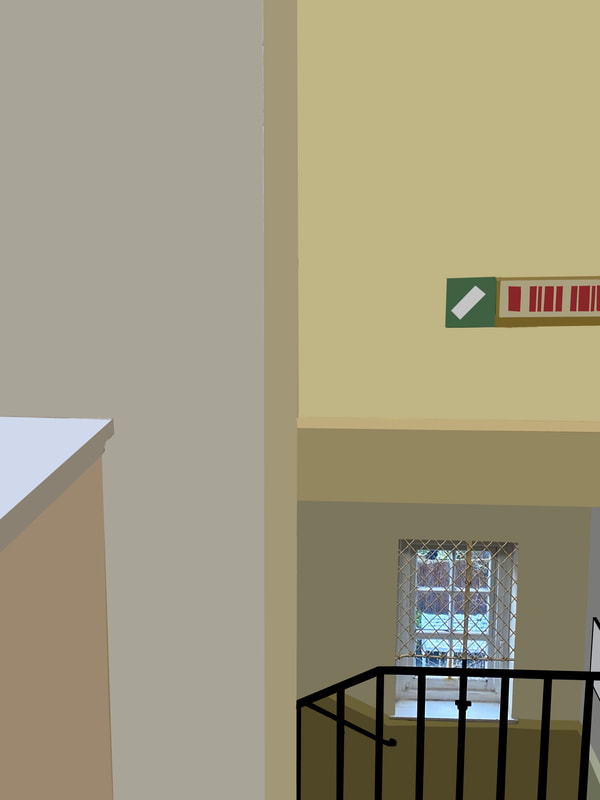
Johnny Kerr - Ambiguity
|
Jhonny Kerr, the artist I reseerched, discoverd, and caputred the beuty of architecure through his photography. His photos go beyond mere buildings, as each one is a study of the elemnts that captivate him, such as shape, space, volume, line, and rythm.
Kerr would spend hours photograping, patiently waiting for the perfect lighting to reveel new relationships and create images that transcend our everyday reality. |
|
First attempts
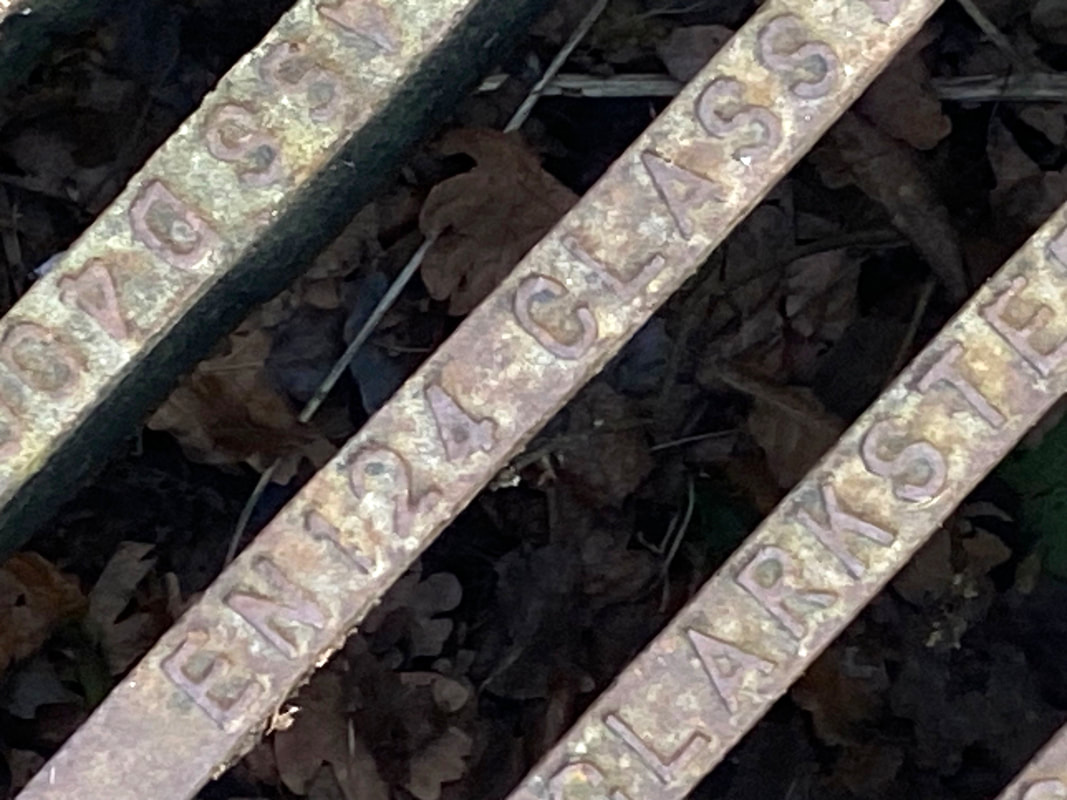
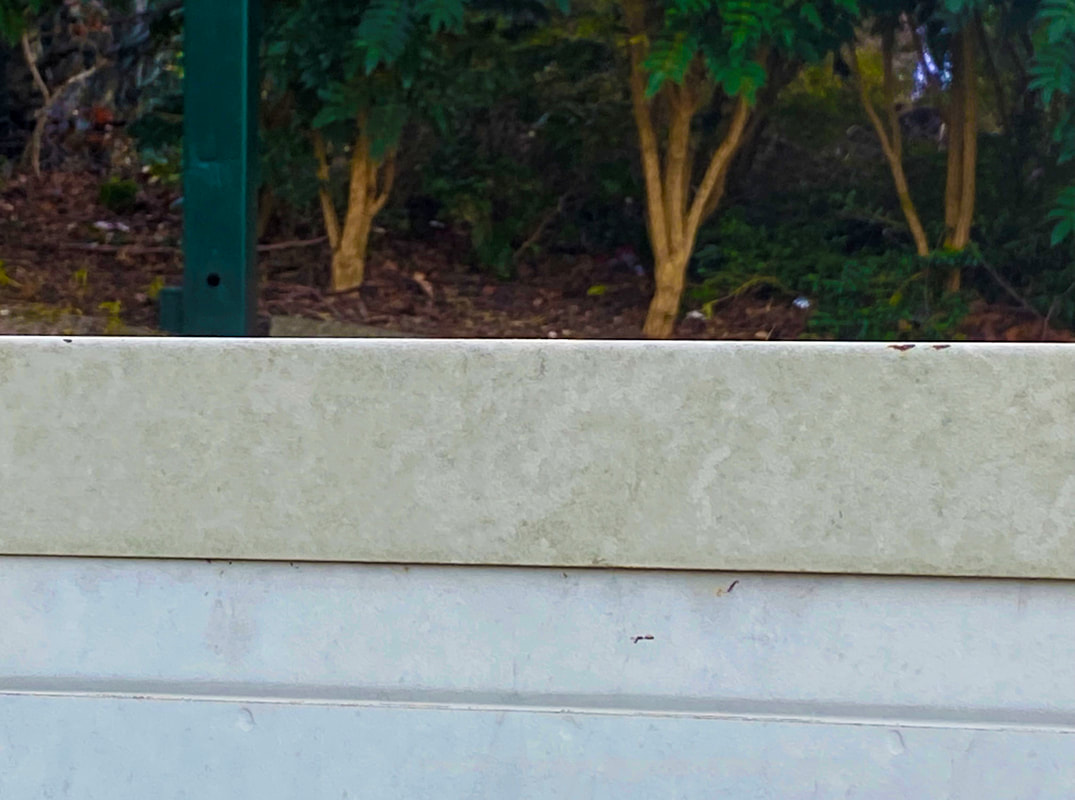
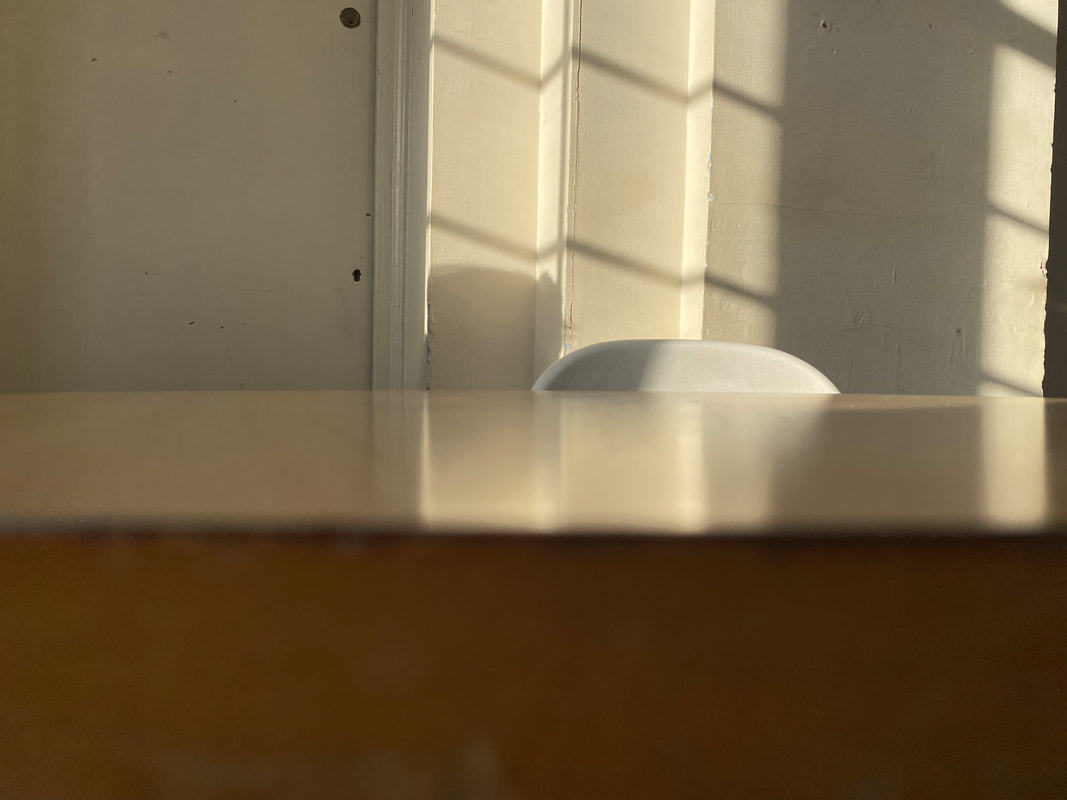
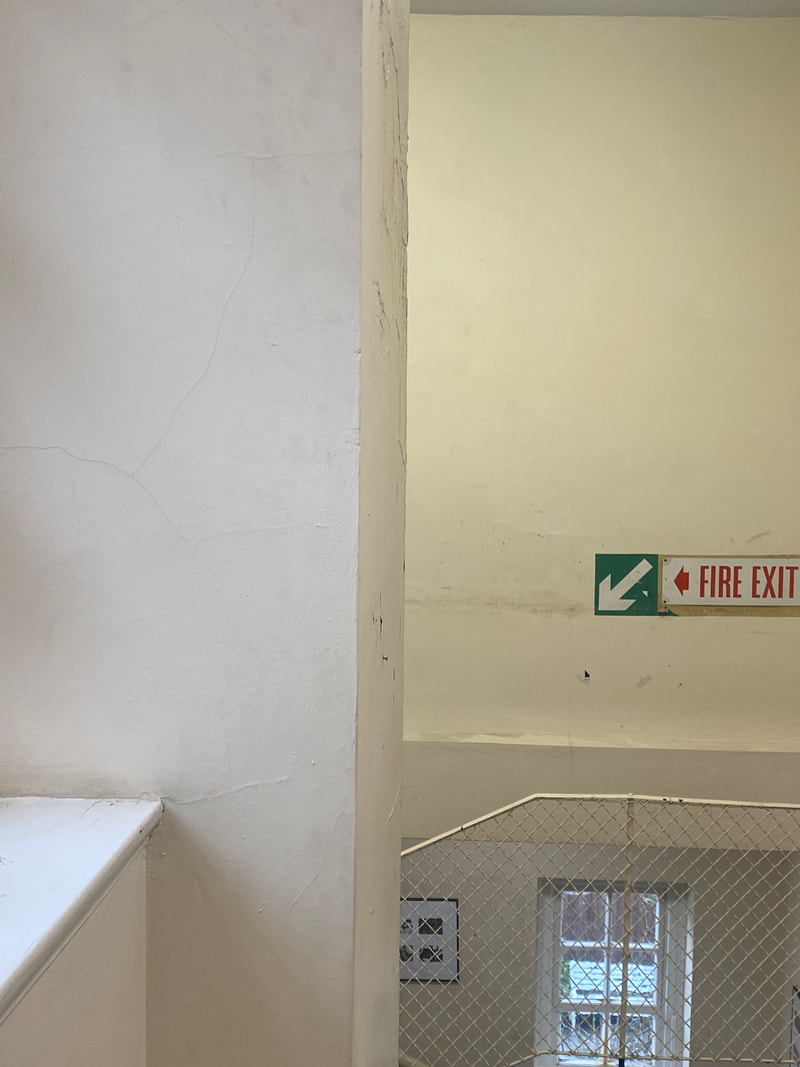
For these set of pictures we went around our school taking pictures with our phone camera of colour contrasts in every day objects we see. this is under the influence of the photographer Jhonny Kerr. my photos are below
Best edits
|
|
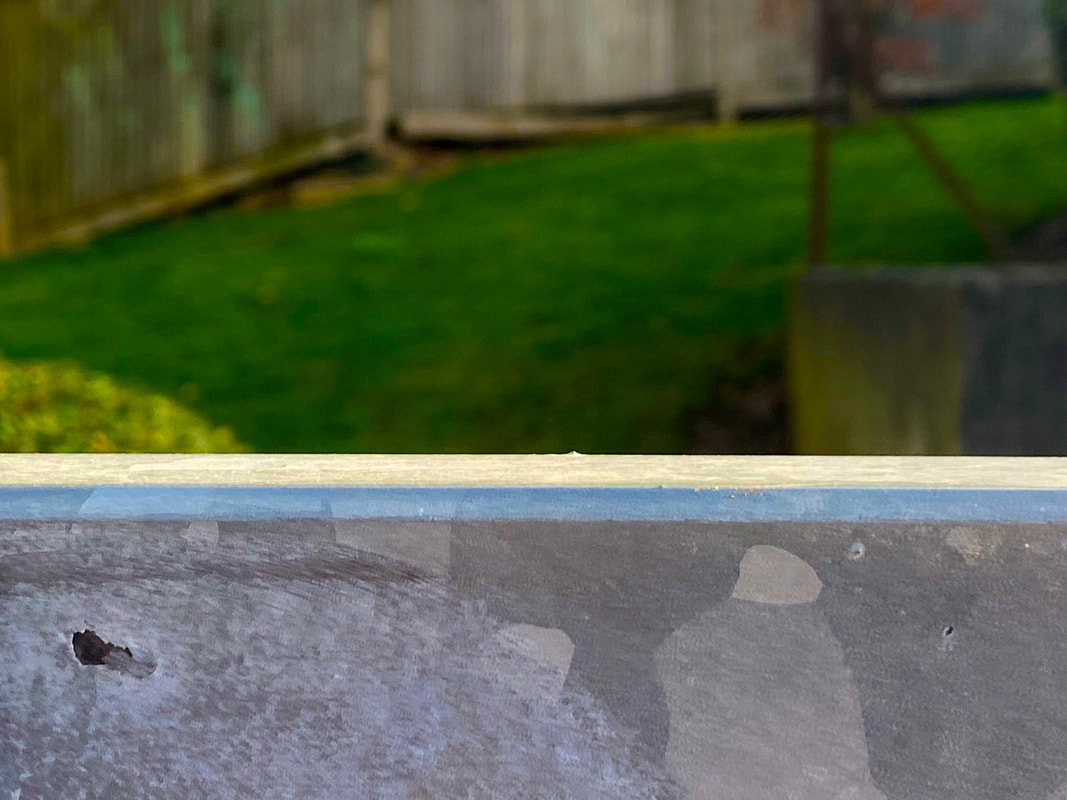
The editing process for these set of photos were simple., What I first did was change the exposure levels to get the best lighting / exposure and them adjusted the vibrancy and saturation. I think the angling went well but needed to improve on variety of photos.
Development
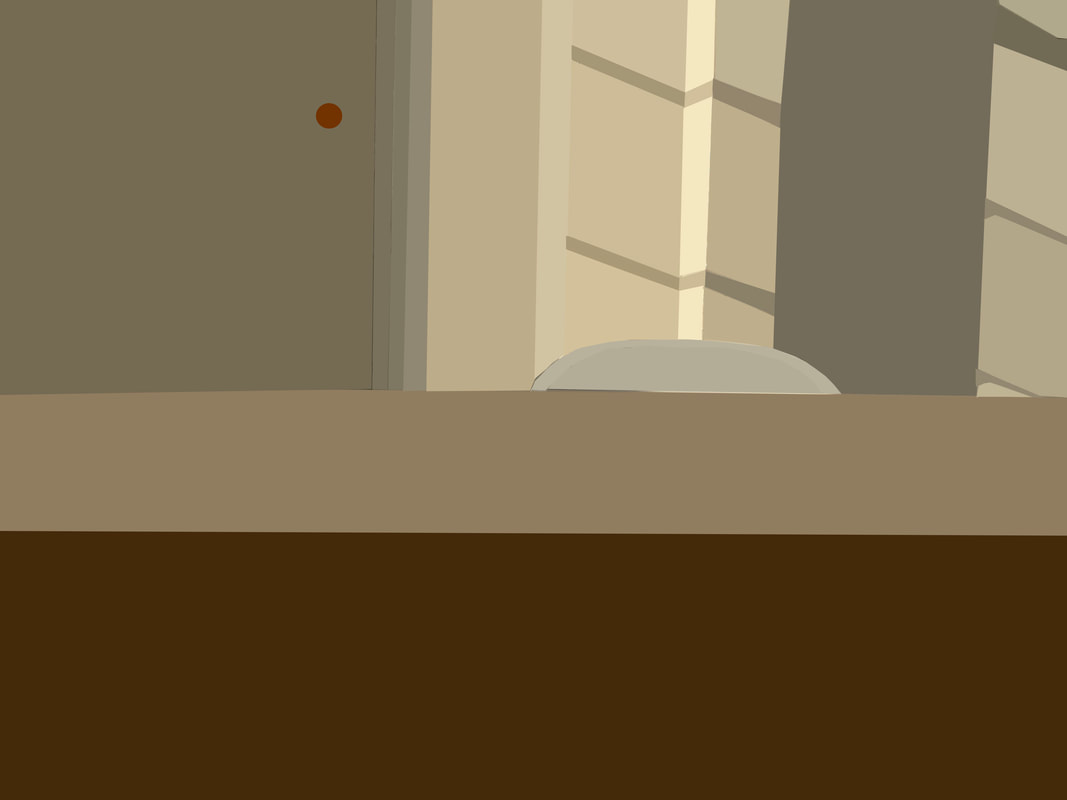
for this development we used the same photos as the set above but used a different more abstract editing style were we simplified the details of the photos by levelling out the colour of a big area.
|
|
|
|
to edit these photos I had to first adjust the exposure levels to get the right lighting I then adjusted the vibrancy and saturation. this was to get the perfect photo before going into the more complicated editing. the last step of editing was the longest were I had to select an big area of the building and level out the colour by editing it then pressing average to change the whole thing to the average colour. I think the editing went well but to improve I would've edited more photos.
Half term homework.
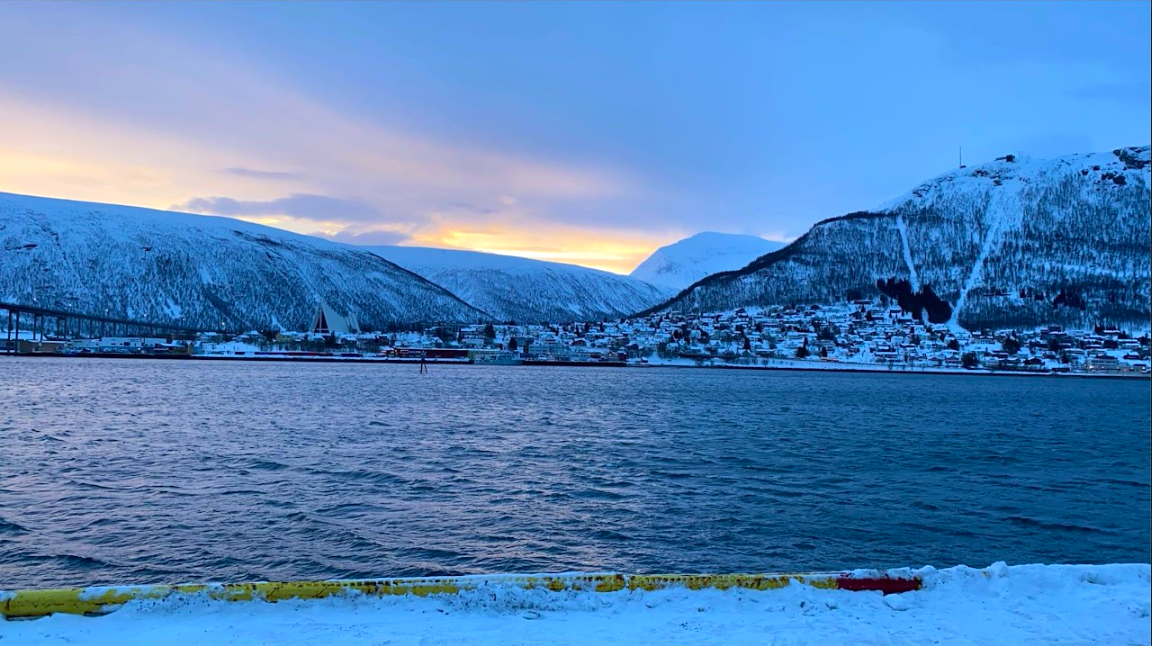
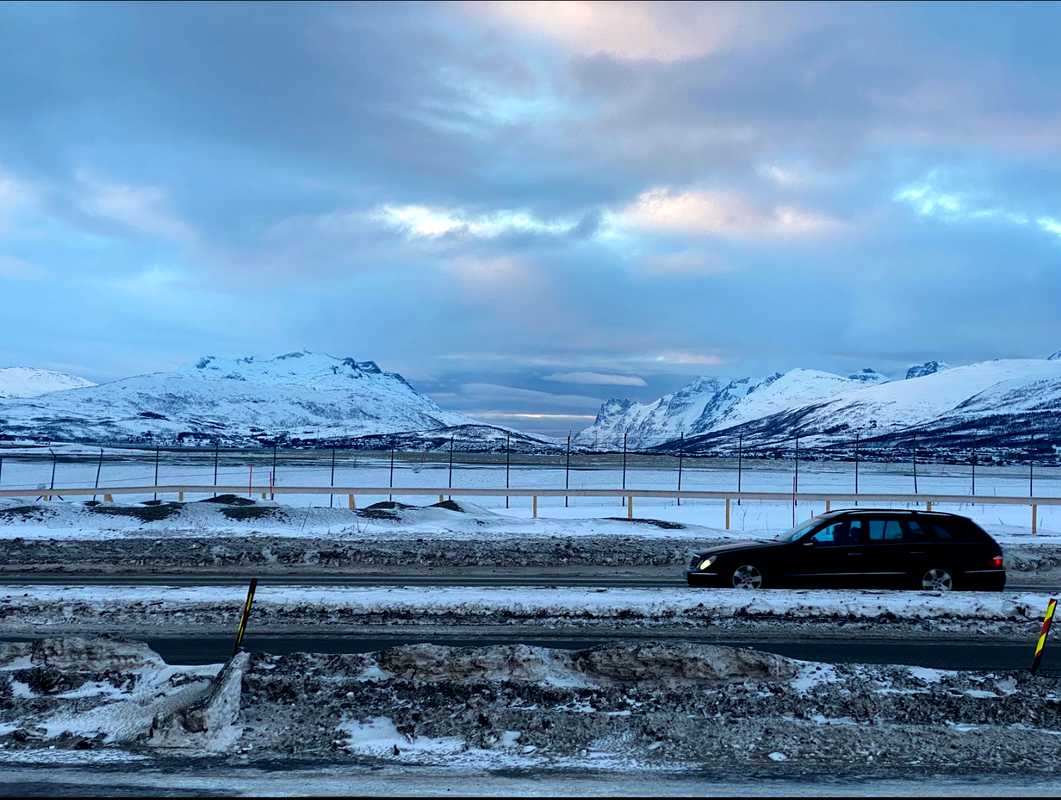
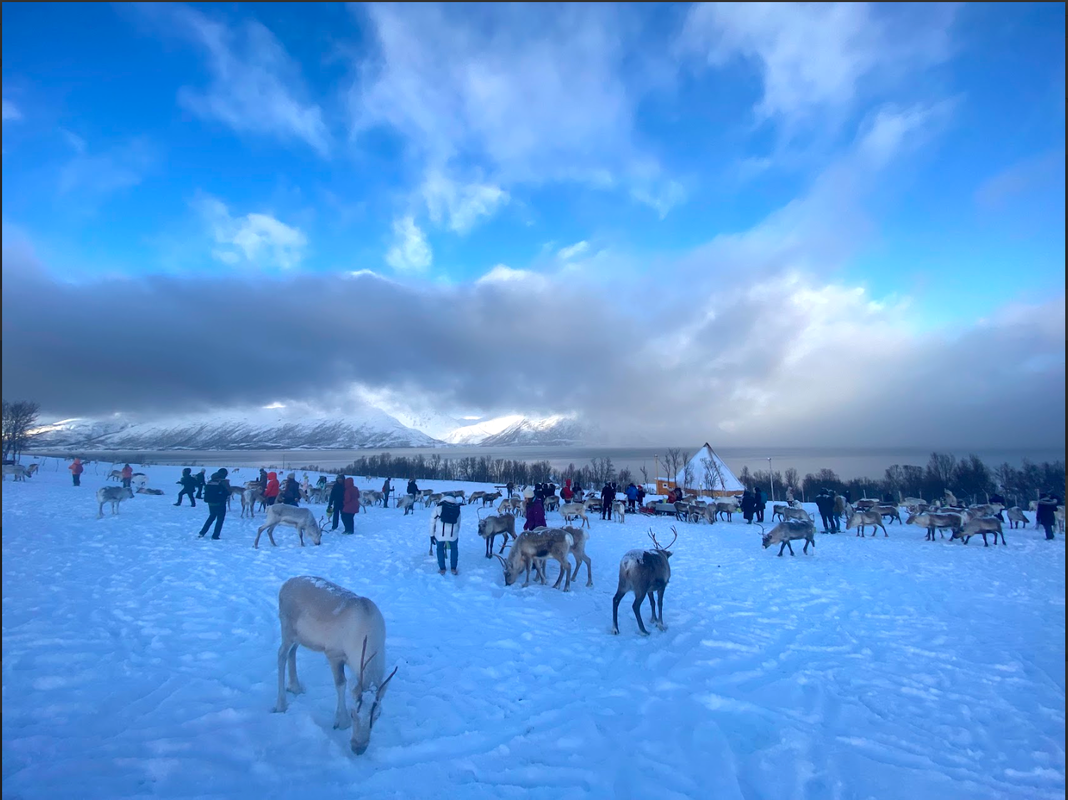
First attempt - Norway.
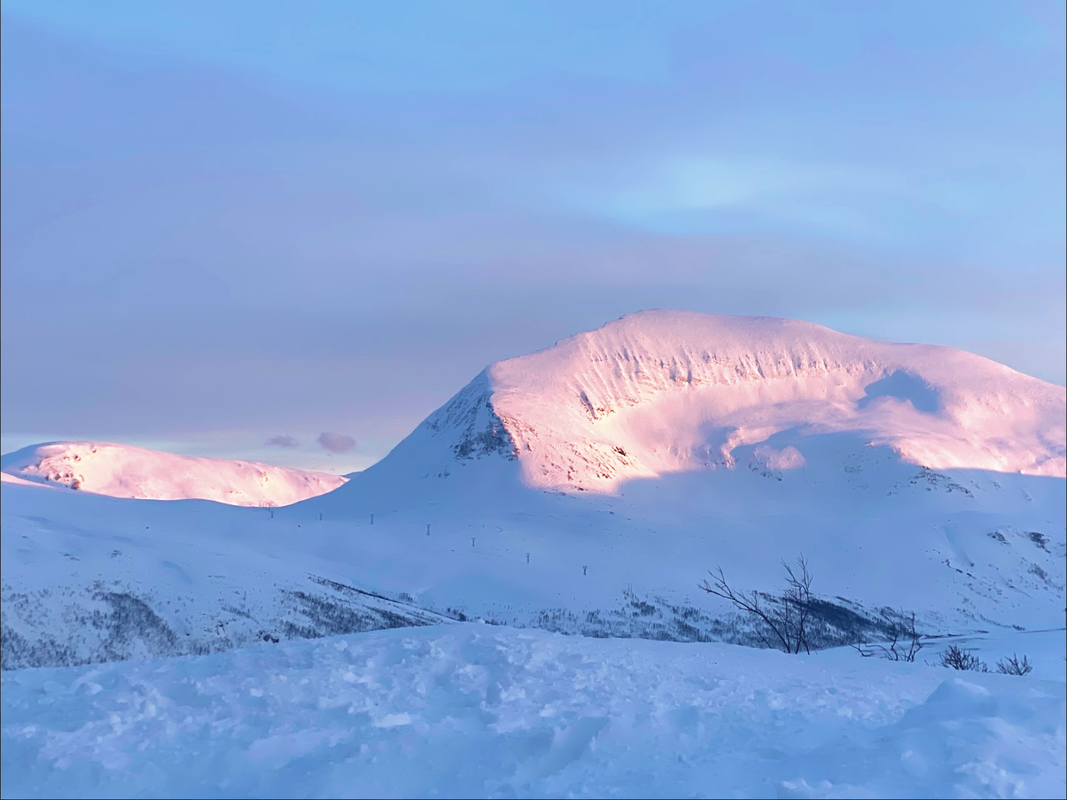
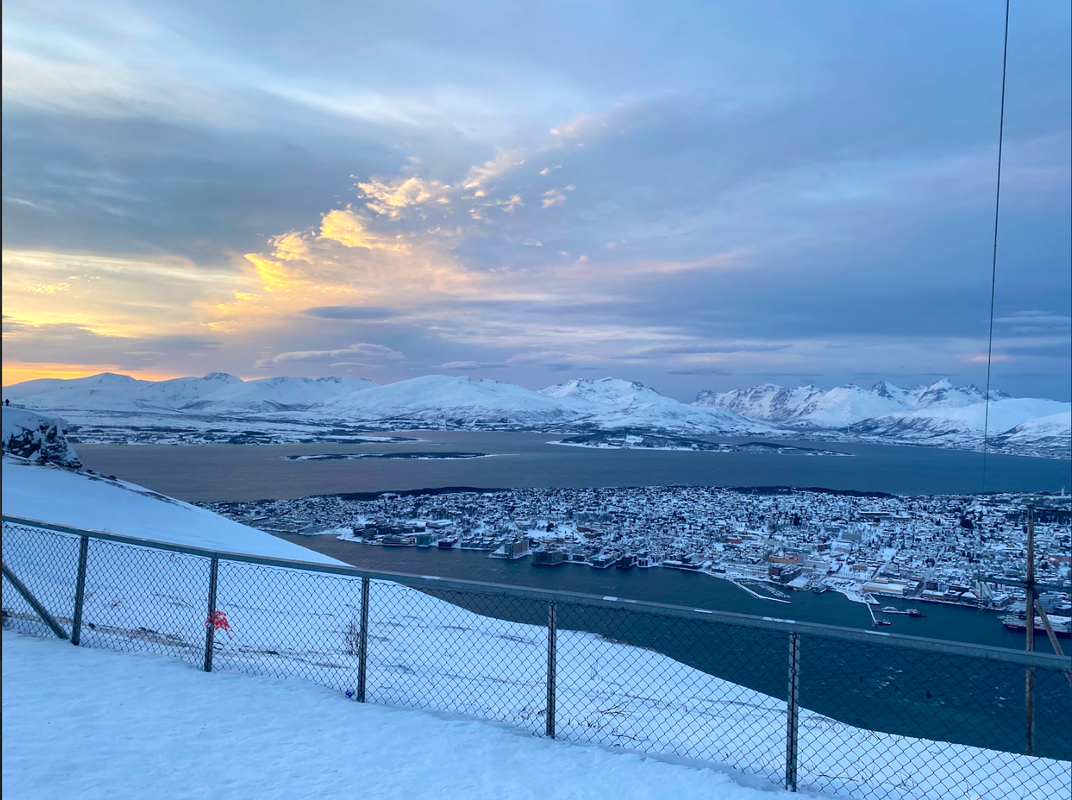
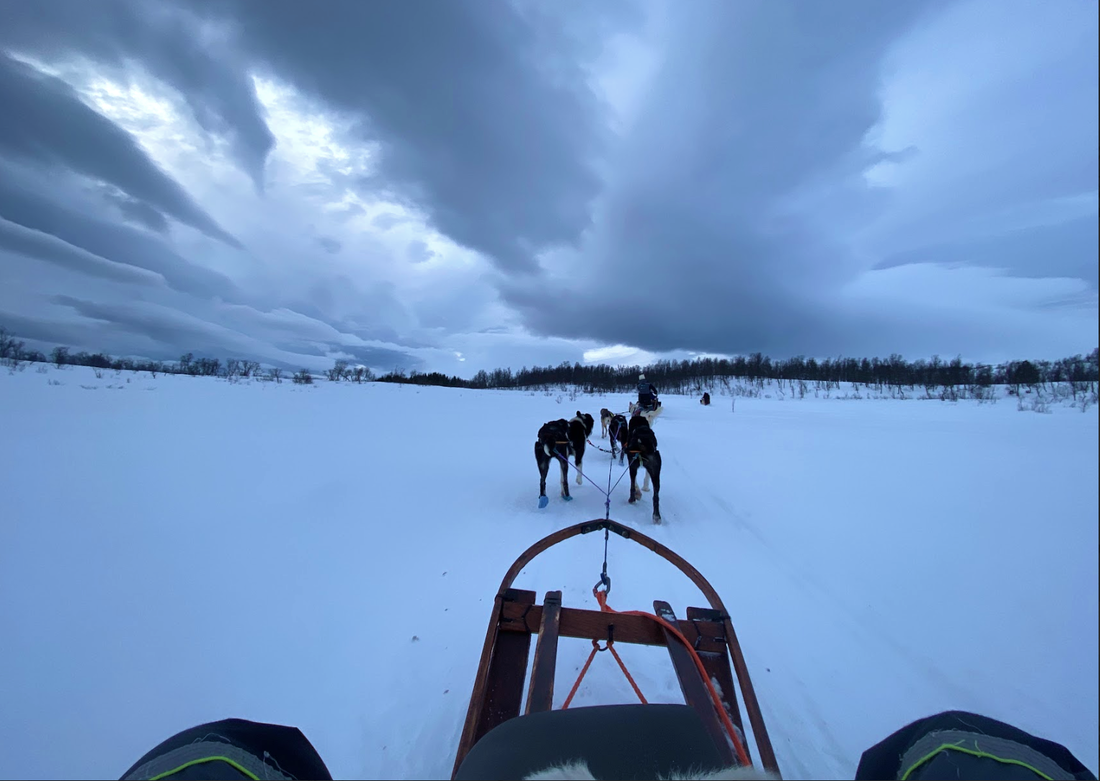
for my set of photos I went to Norway to take pictures of landscape I used my phone to take these photos and went to areas with good lighting and open areas. I took a total of 108 photos and edited 6. The area I was in is in the north of Norway in a place that is called Tromso


Best edits.
|
|
|
|
It was an easy process to edit these photos as there wasn't much to edit but all I did was adjust the light levels to get the perfect exposure then adjusted the vibrancy and saturation to get more of a blue tone in these photos. for this whole group of photos i think the scenery and lighting went very well with a very good choice of location.
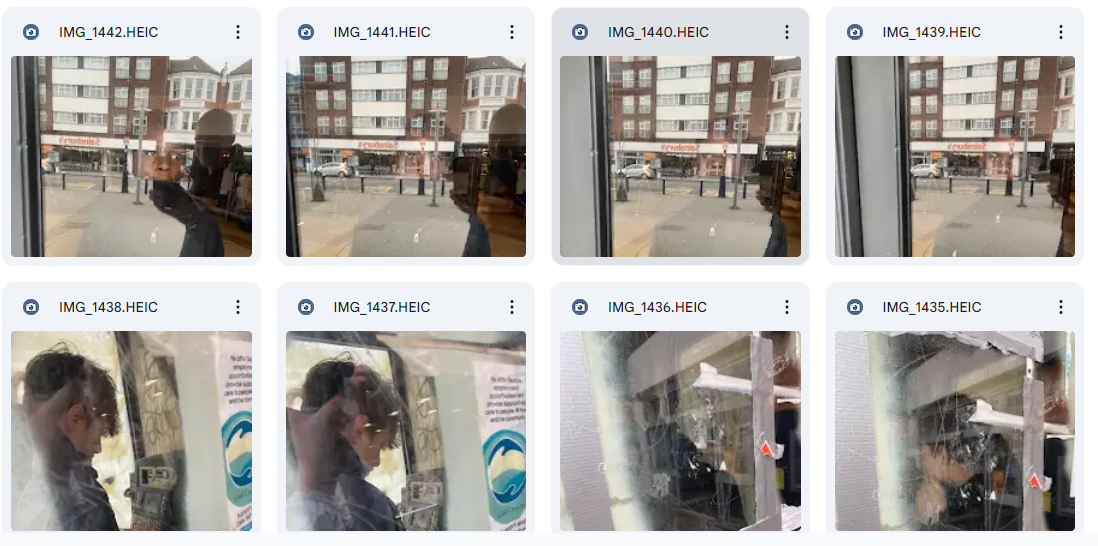
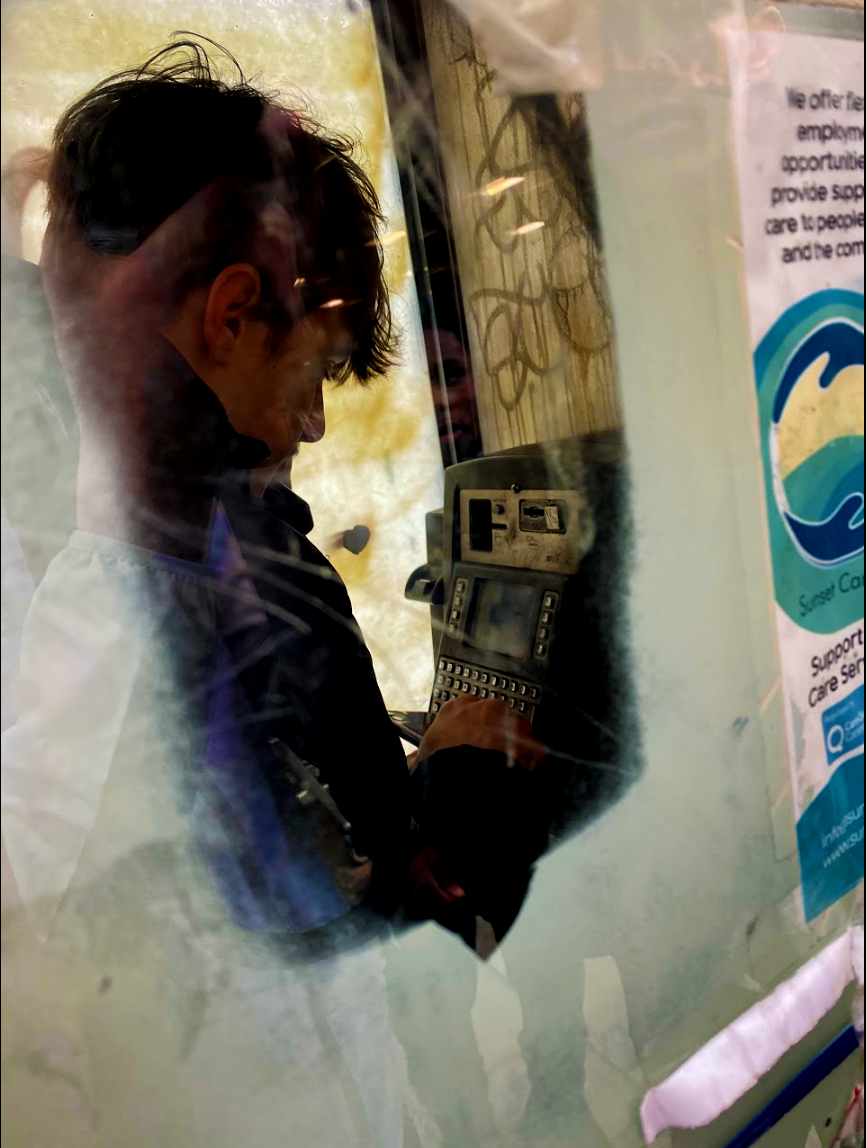
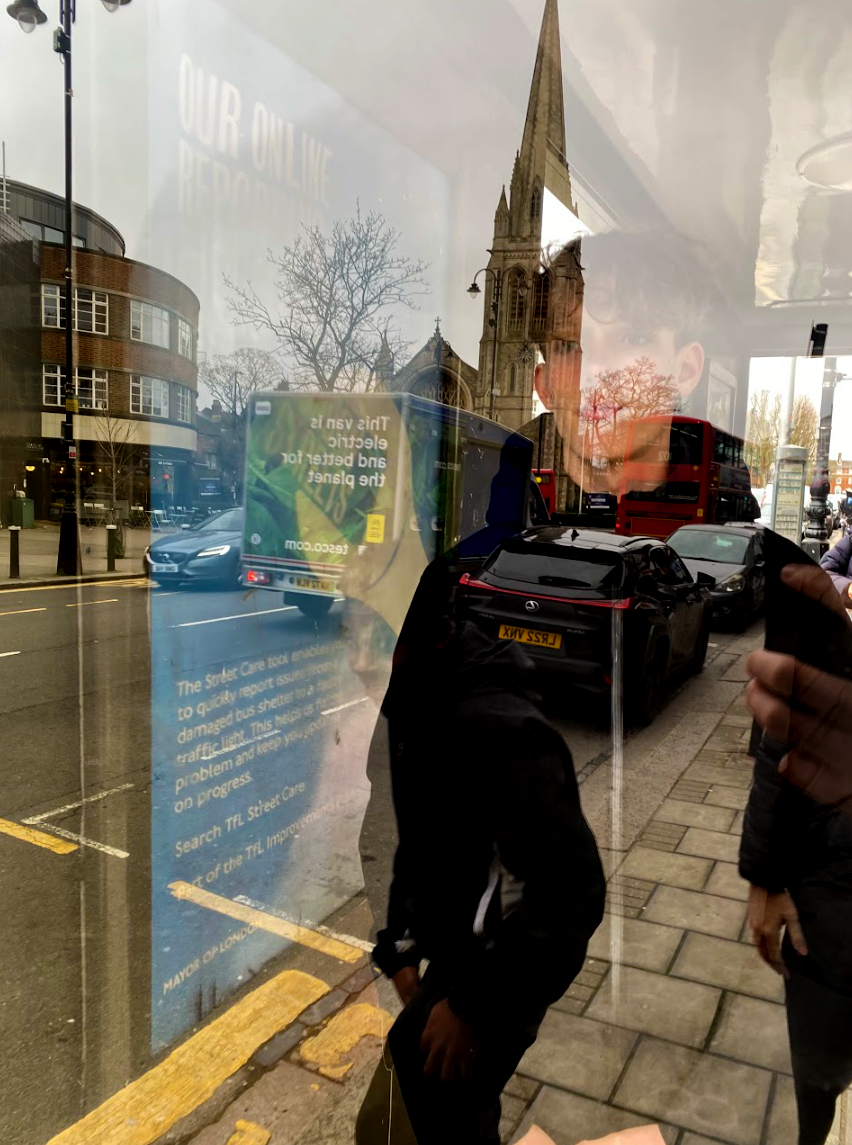
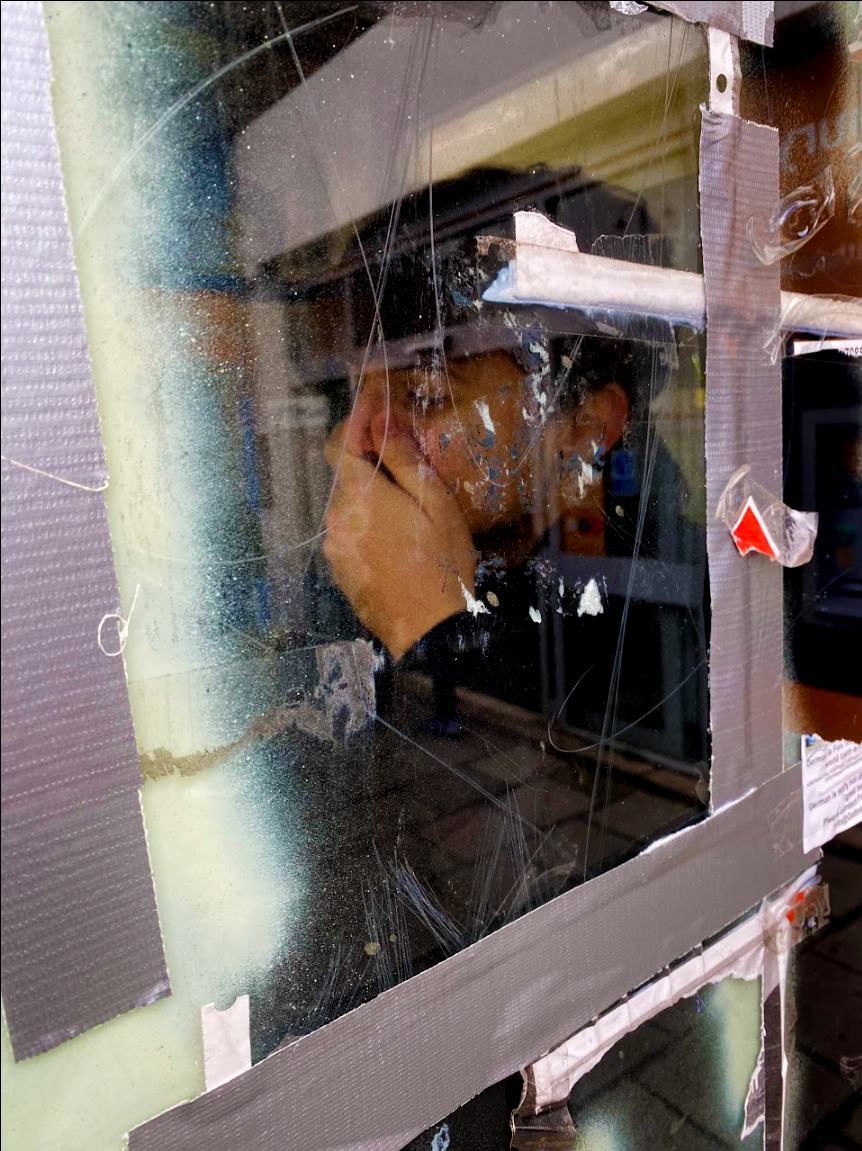
Saul Leiter
|
Saul Leiter is an american phtographer who was born in pittsburgh Pennsylvania who later in his life at the age of 23 moved to new york. when Saul moved to new york he started documenting street life there in a series of black and white intruiging photos were he would also blurr the movement and conceal details of said photosto give a greater film worthy and abstract effect to the photos.
Lieter also did coloured photography were he took distinctive photos were he would play with depth of field and the vibrancy of his photos. and it is argued that you can see influences of abstract expressionism in his colour work. |
|
First attempts
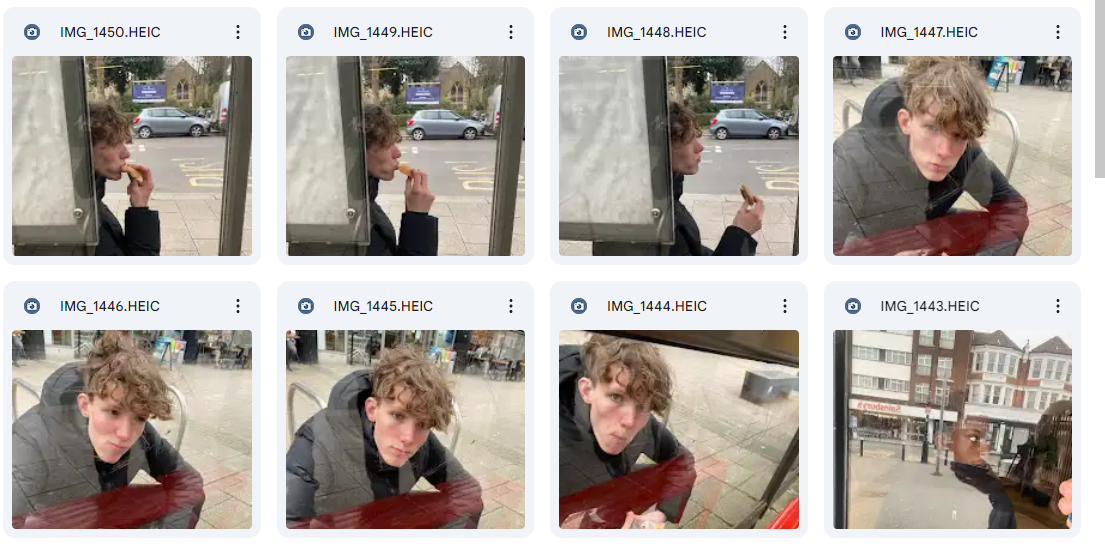
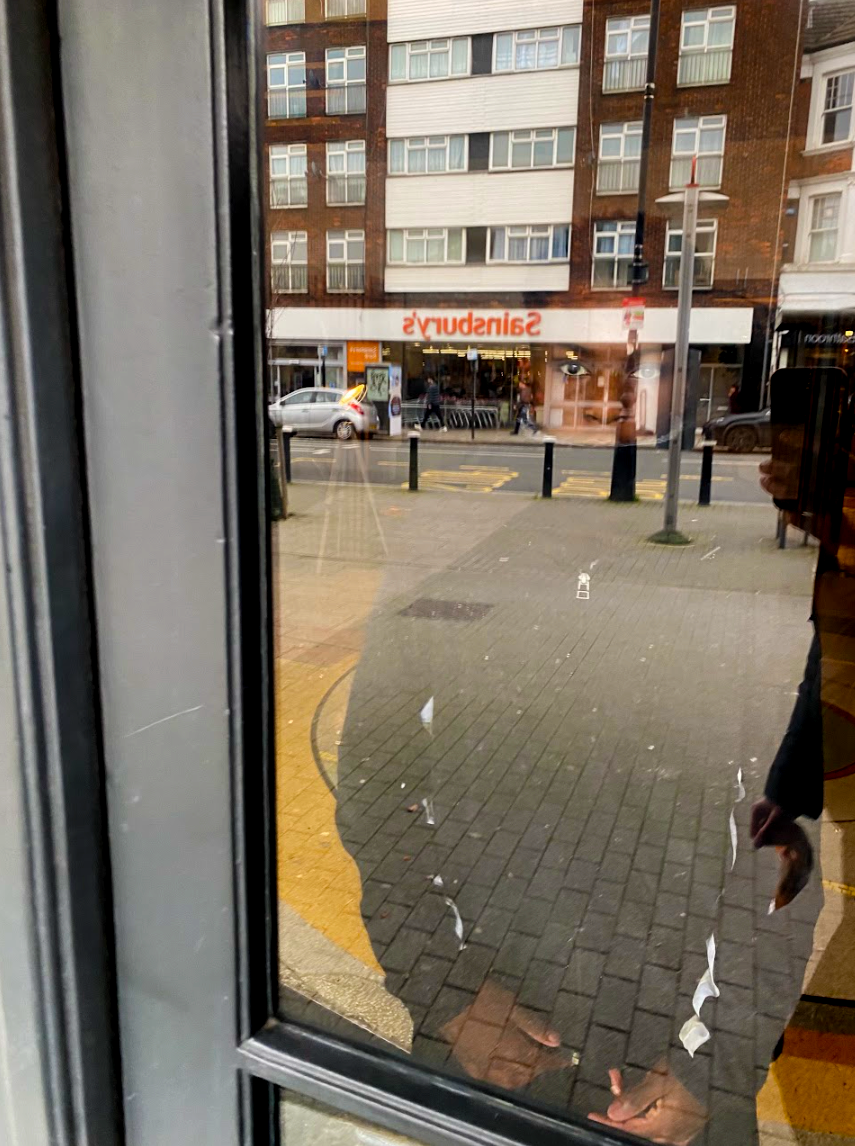
For this set of photography we went out to musswell hill which is the local area near my school the reason we went there was because of the variety of different windows and glass to take photos through as that is part of Sauls work. for these photos i used my iphone camera and priotised my subject which was a person to be behind dirty / scratched glass as this was what we were instructed to do i also had to make sure the focus was on the person as the scratches of the glass were in the foreground. My photos are below.
|
|


Best edits
|
|
The editing process for these photos were very simple were all i had to do was adjust the exposure levels and vibrance levels to give hat full affect of Saul Lietters work were the glass reflection would conceal some of the details of the subject behind. In this set of photos i think the location and subject positioning went well but if i were to improve i would take the photos againat a later time in the day for better lighting.
Strand 1
Johnny Kerr
|
For my first strand of this project I did the photographer Johnny Kerr. I chose him as were did his photos recently and I liked his style particularly the second editing style he did were you use photoshop to average the colour of the photo to give more of a simplistic look. Johnny Kerr takes photos of every day buildings focusing on lighting and colour to give an almost abstract effect he also focussed on the symphony off shapes and lines.
his photos are to the right |
|
Attempts
For my strand 1 attempts i took photos in a range of places to get the best photos. I took these with my iphone 11 camera and made sure the subjects of the photos were recognisable everyday scenery and had colour contrast to them so it would go well with the editing process i did with it.
Best edits


|


|
For both of my edits i took my tube station photos as i thought it went best with this task. to edit these photos i first started of by adjusting the light levels to get the xposure right i then selected eache part of the photo with the polygonal lasso tool then went to blur and average the colour to give a cartoon effect and a more simplistic effect. I think the editing in this photo went very well but to improve i wouldve went to more brutalist buildings as i believe it wouldve looked good with this task.
strand 2
Dennis Wojtkiewicz
|
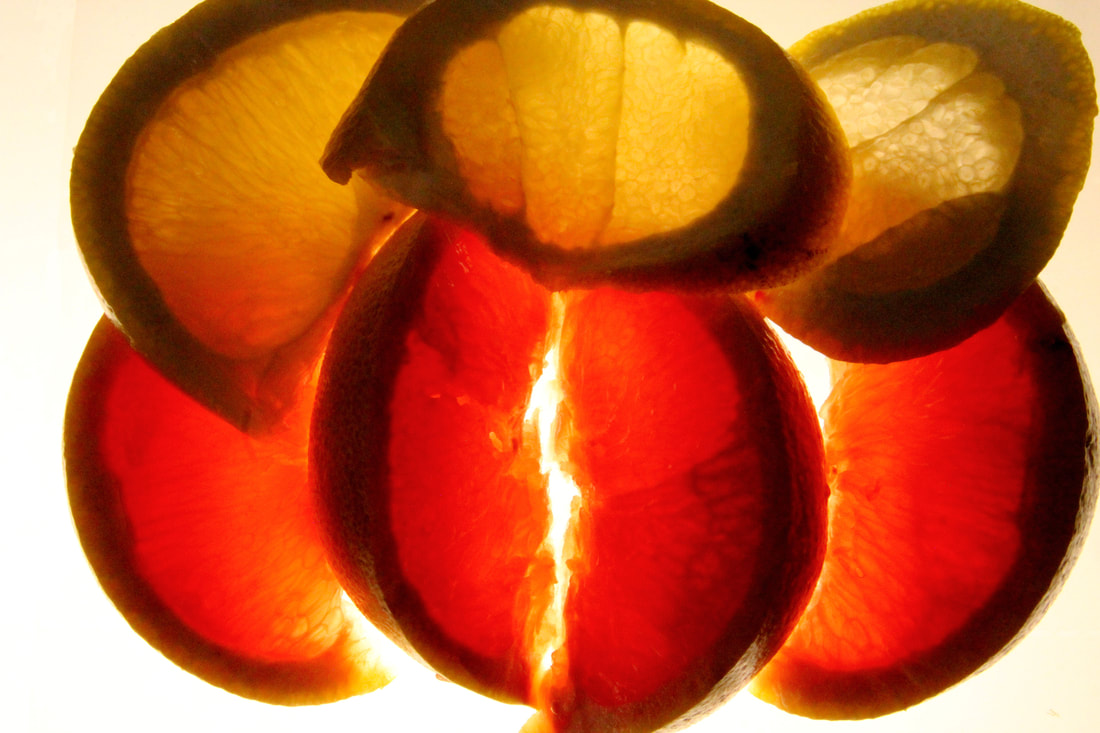
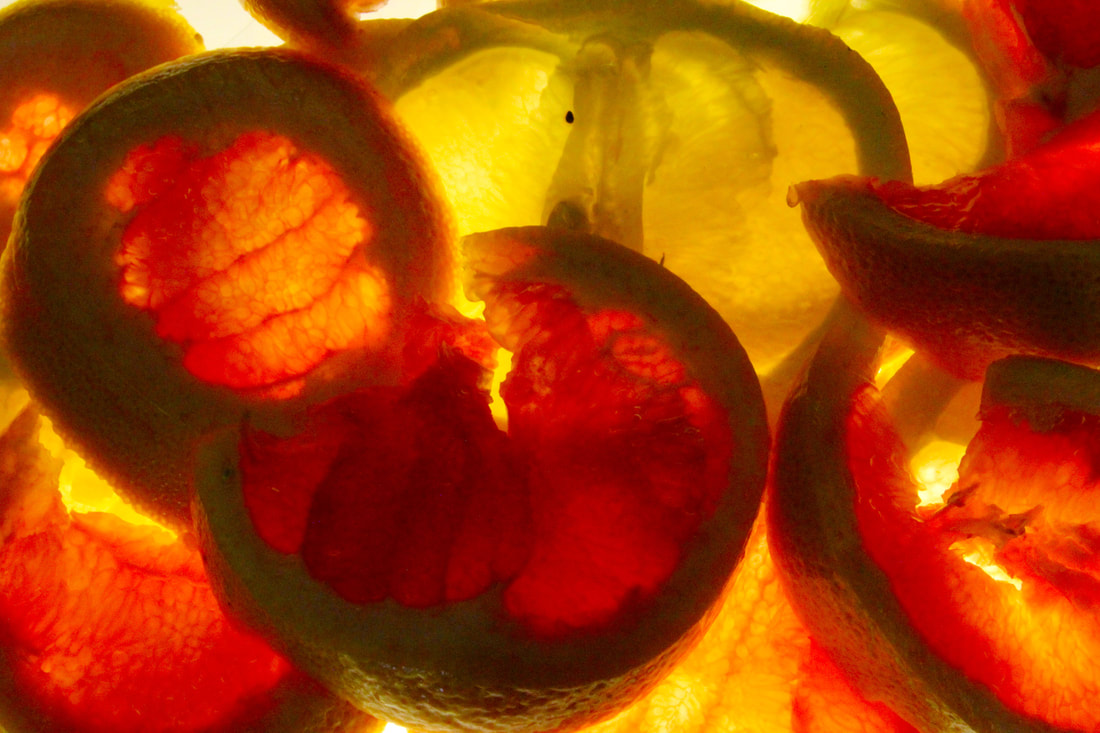
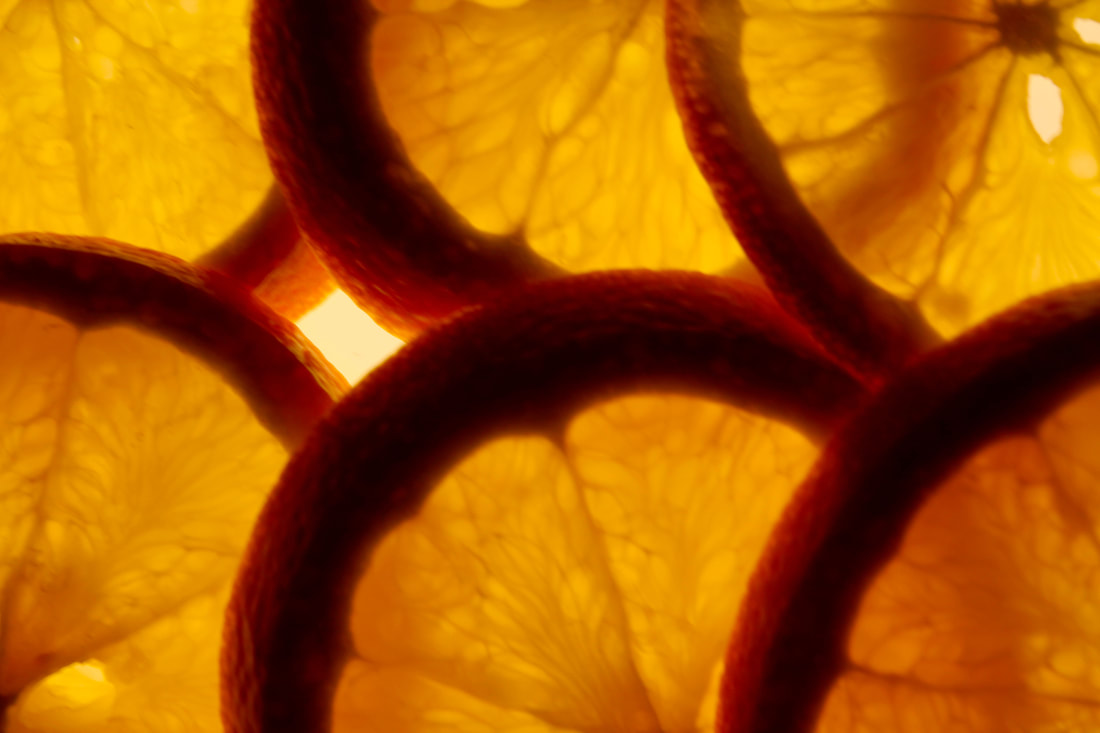
For my second strand of this project I decided to chose to work inspired by a painter I found on Pinterest. This painter is called Dennis woitkiewicz who is a professor at Art and bowling green state university were he has taught painting since 1988 were he is best known for his large scale painting of fruit were the fruit is thinly sliced and light peers through the segments of cut fruit.
I chose him, because his hyper realistic art can be welly translated to photography by using the right equipment and I like his work with light exposure and subject placing. his paintings are to the right. |
|
My attempts
For my first attempts I bought 2 different types of grape fruits one white and one red I then cut it into different slices from wedges to basic thin slices and placed them on a light board to shine light through them I then took photos of them with a DSLR camera in different positions and stacks to best resemble his work.
Best edits
|

|
The editing process for these photos were simple all I had to do was adjust the light level to get the perfect exposure then adjust vibrancy to best simulate Dennis work I think the subject positioning went well but to improve I would add a black background to the light box and cut holes in the black card to were I want light to go through.
Development 1
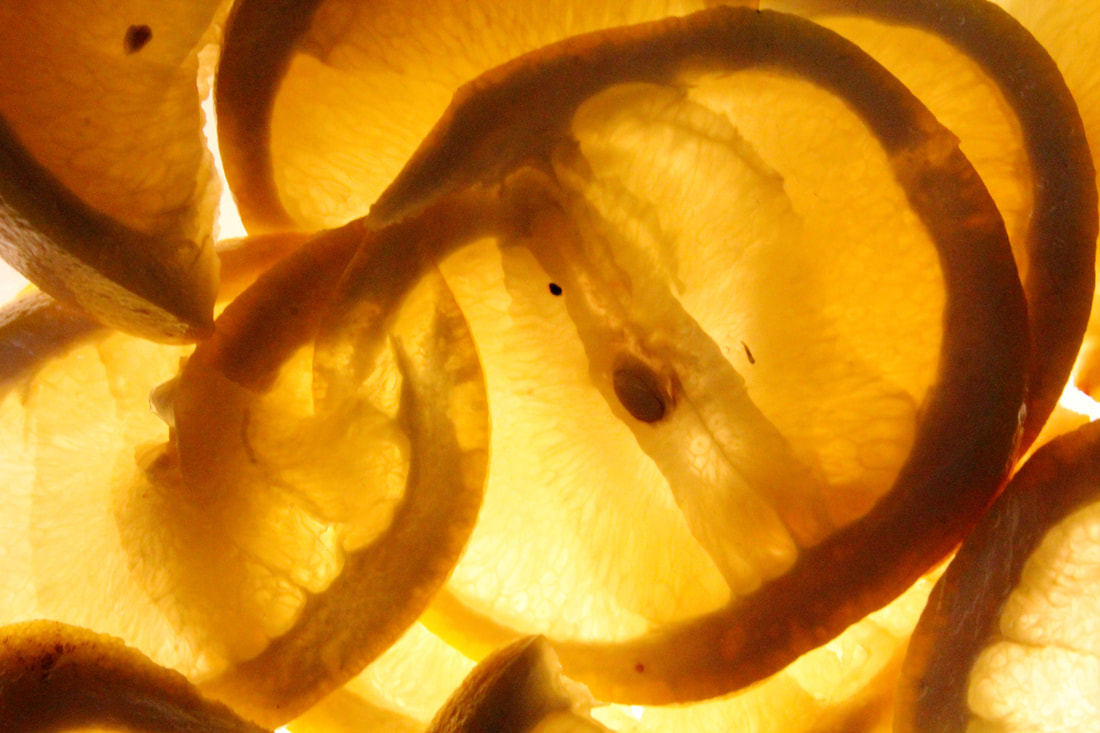
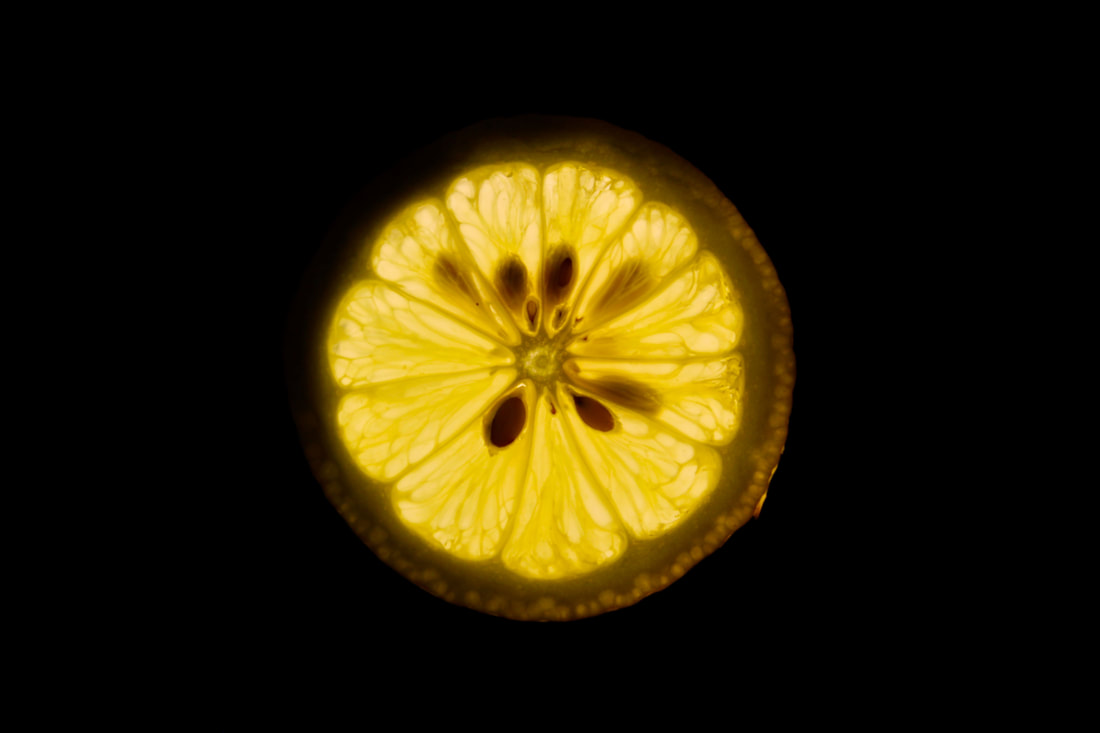
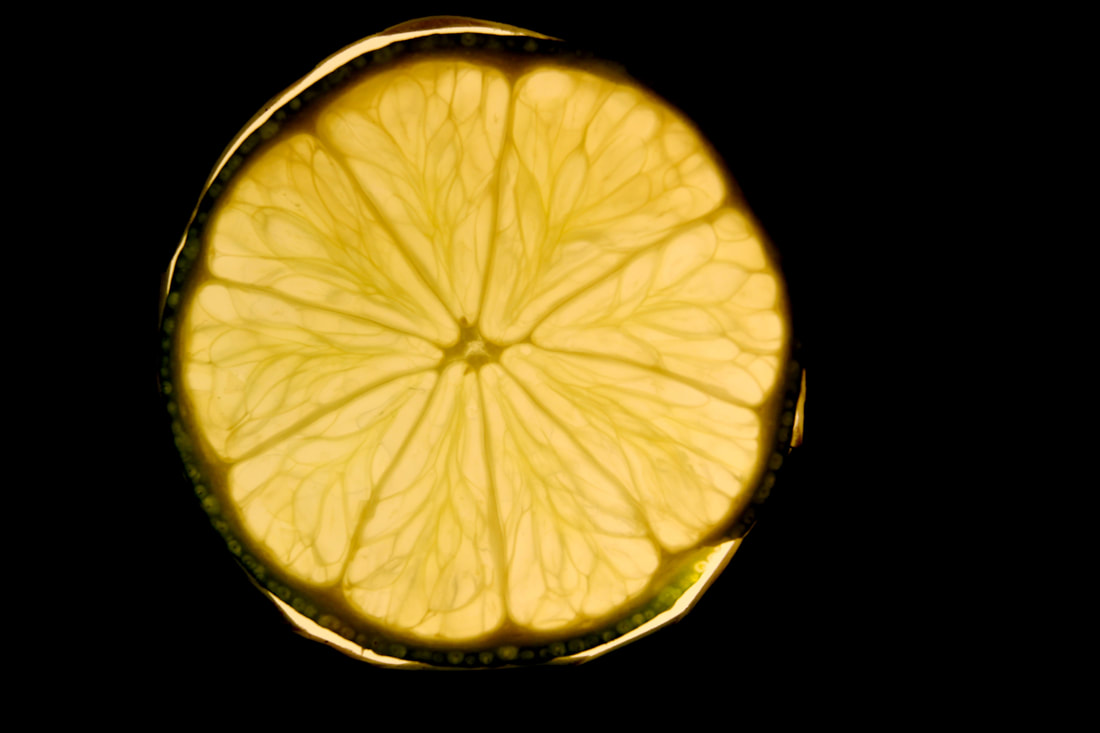
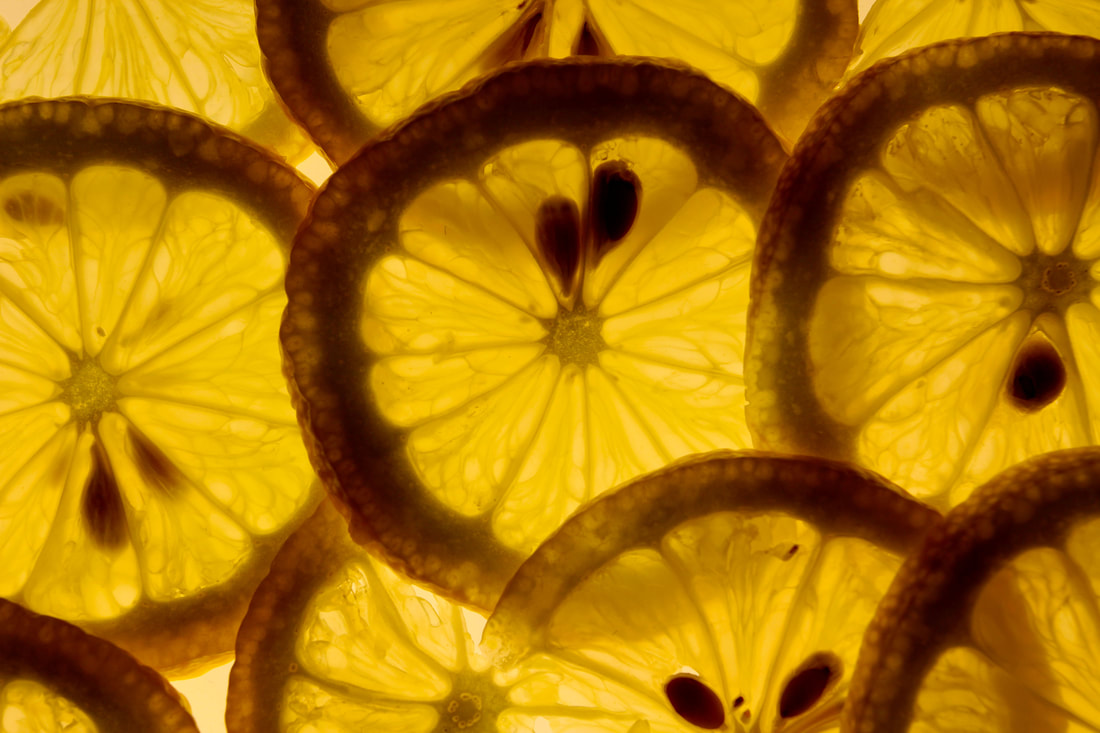
For my development 1 I developed the work of Dennis Wojtkiewicz who did the paintings of various fruit and light shining through them. i decided to develop his work as I liked his symmetry of his paintings and the vibrant style of paintings i also liked how well this painting style translated to photography.
My attempts
for this next development I changed through fruit I used to a lemon and lime as i thought they would give better results i also again used a DSLR camera band used a light box to get the light through the fruits but I also used a piece of black card with cut-outs for the fruit so i could decide were the light would be and give the photo a neutral background just like Dennis's paintings.


Best edits
|
|
My editing process for this development was the same as strand 2 as all i had to do was adjust the light levels of the photo then the vibrancy. i think that the thinly sliced lemon and lime including the placement and exposure went well but if i had to improve i would focus on more of the single slice shots as it would closer resemble Dennis's work.
Final Development
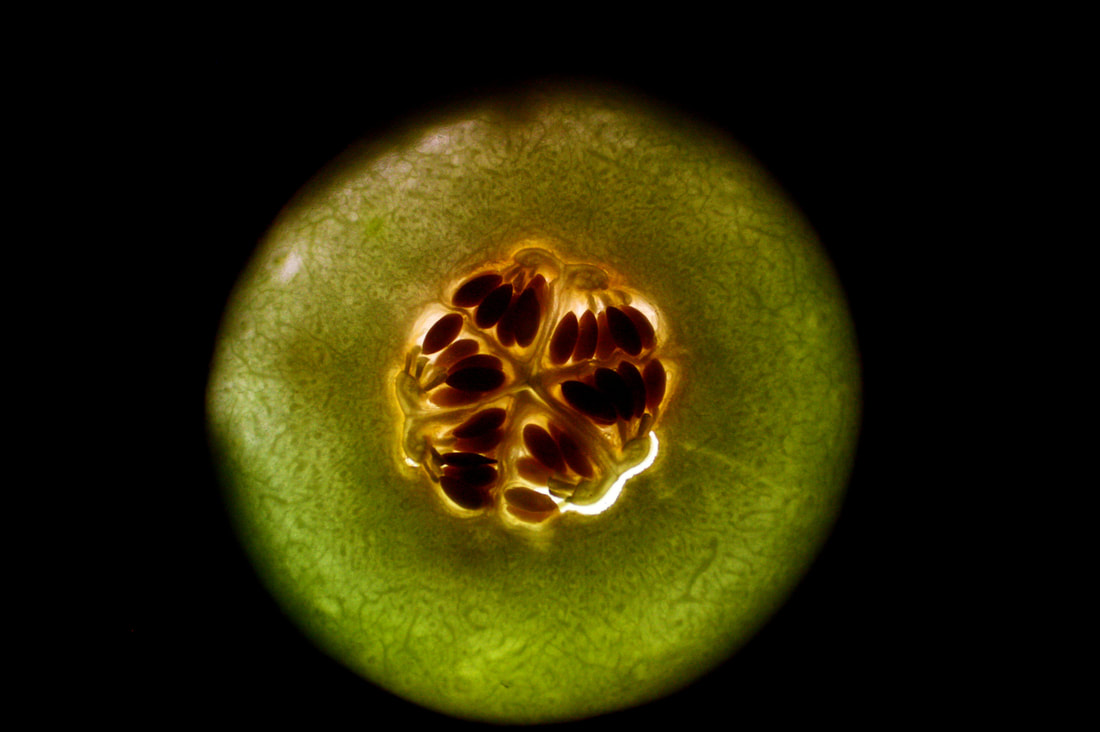
For my development 2 I again switched up what fruit I used and used a kiwi and a melon I also used the same camera the DSLR but for this development i focused mainly on the single slice shots behind a black background.
My attempts
For my attempts I used the same equipment as my last development apart from the fruits but i also decided to do a couple of photos in natural light.
My photos are below.
My photos are below.
Best edits

|


|
The editing process for these photos were the same as the last 2 developments were I just had to adjust light levels and then the vibrancy. I think the lighting / exposure went well along with the positioning and framing of subject and the thickness of each slice of fruit. To improve i would try get a more balanced lighting that shined light equally through the whole subject and also a more of a white light.
